

Deploy and Mint a CryptoKitties-Like NFT with ERC-721 Smart Contract


Dawn of ERC-721
Mention NFT revolution and you will most likely stumble upon this project over and over again: CryptoKitties. Originally built on the Ethereum blockchain, CryptoKitties was the first non-fungible token (NFT) that allowed the creation of unique digital collectibles as kitties, using the ERC-721 smart contract. Before the dawn of ERC-721, tokens on blockchain were only fungible, meaning they can be traded or exchanged with another identical one of the same value, much like a dollar bill.
We've already discussed how you can make a fungible token using ERC20↗, but what if you want to create tokens that are not alike at all?
What we are Building
CryptoKitties really braced the growth and use case of NFTs we see today and in this tutorial, we will walk through creating and deploying an ERC-721 smart contract and minting the token on Optimism Kovan-Testnet using Solidity↗, Hardhat↗ and Pinata↗.
By the end of this tutorial - you'll be able to mint an NFT and display it on Quixotic↗ (an NFT marketplace on Optimism) from your deployed ERC721 contract.
Getting Started
PS: I know I just threw a ton of new words at you in the previous section and if any of the above was confusing, don't worry as we'll discuss each one of them in detail.
But before we get our hands dirty, let's take a quick rundown on what Optimism is?
What is Optimistic Ethereum?
Optimism is a layer 2 scaling solution for ETH, meaning it functions on top of the Ethereum mainnet (L1). It uses a technology called rollups, specifically Optimistic rollups, where the transactions are executed off the chain and get bundled into a single transaction before being pushed to the main blockchain. This increases the transaction speed and throughput and decreases the cost per transaction.
Pretty handy, right? Ready to give optimism a try?
Step 1: Connect Metamask to Optimism Kovan Testnet
If you do not own a wallet, the first thing that needs to be done is to download and install the browser extension of MetaMask↗.
Once MetaMask is installed and running, follow these simple steps to connect with Optimism Kovan Testnet:
- Navigate to chainlist.org↗
- Enable the
Testnetoption and search for Optimism Kovan and connect your wallet with the given RPC.
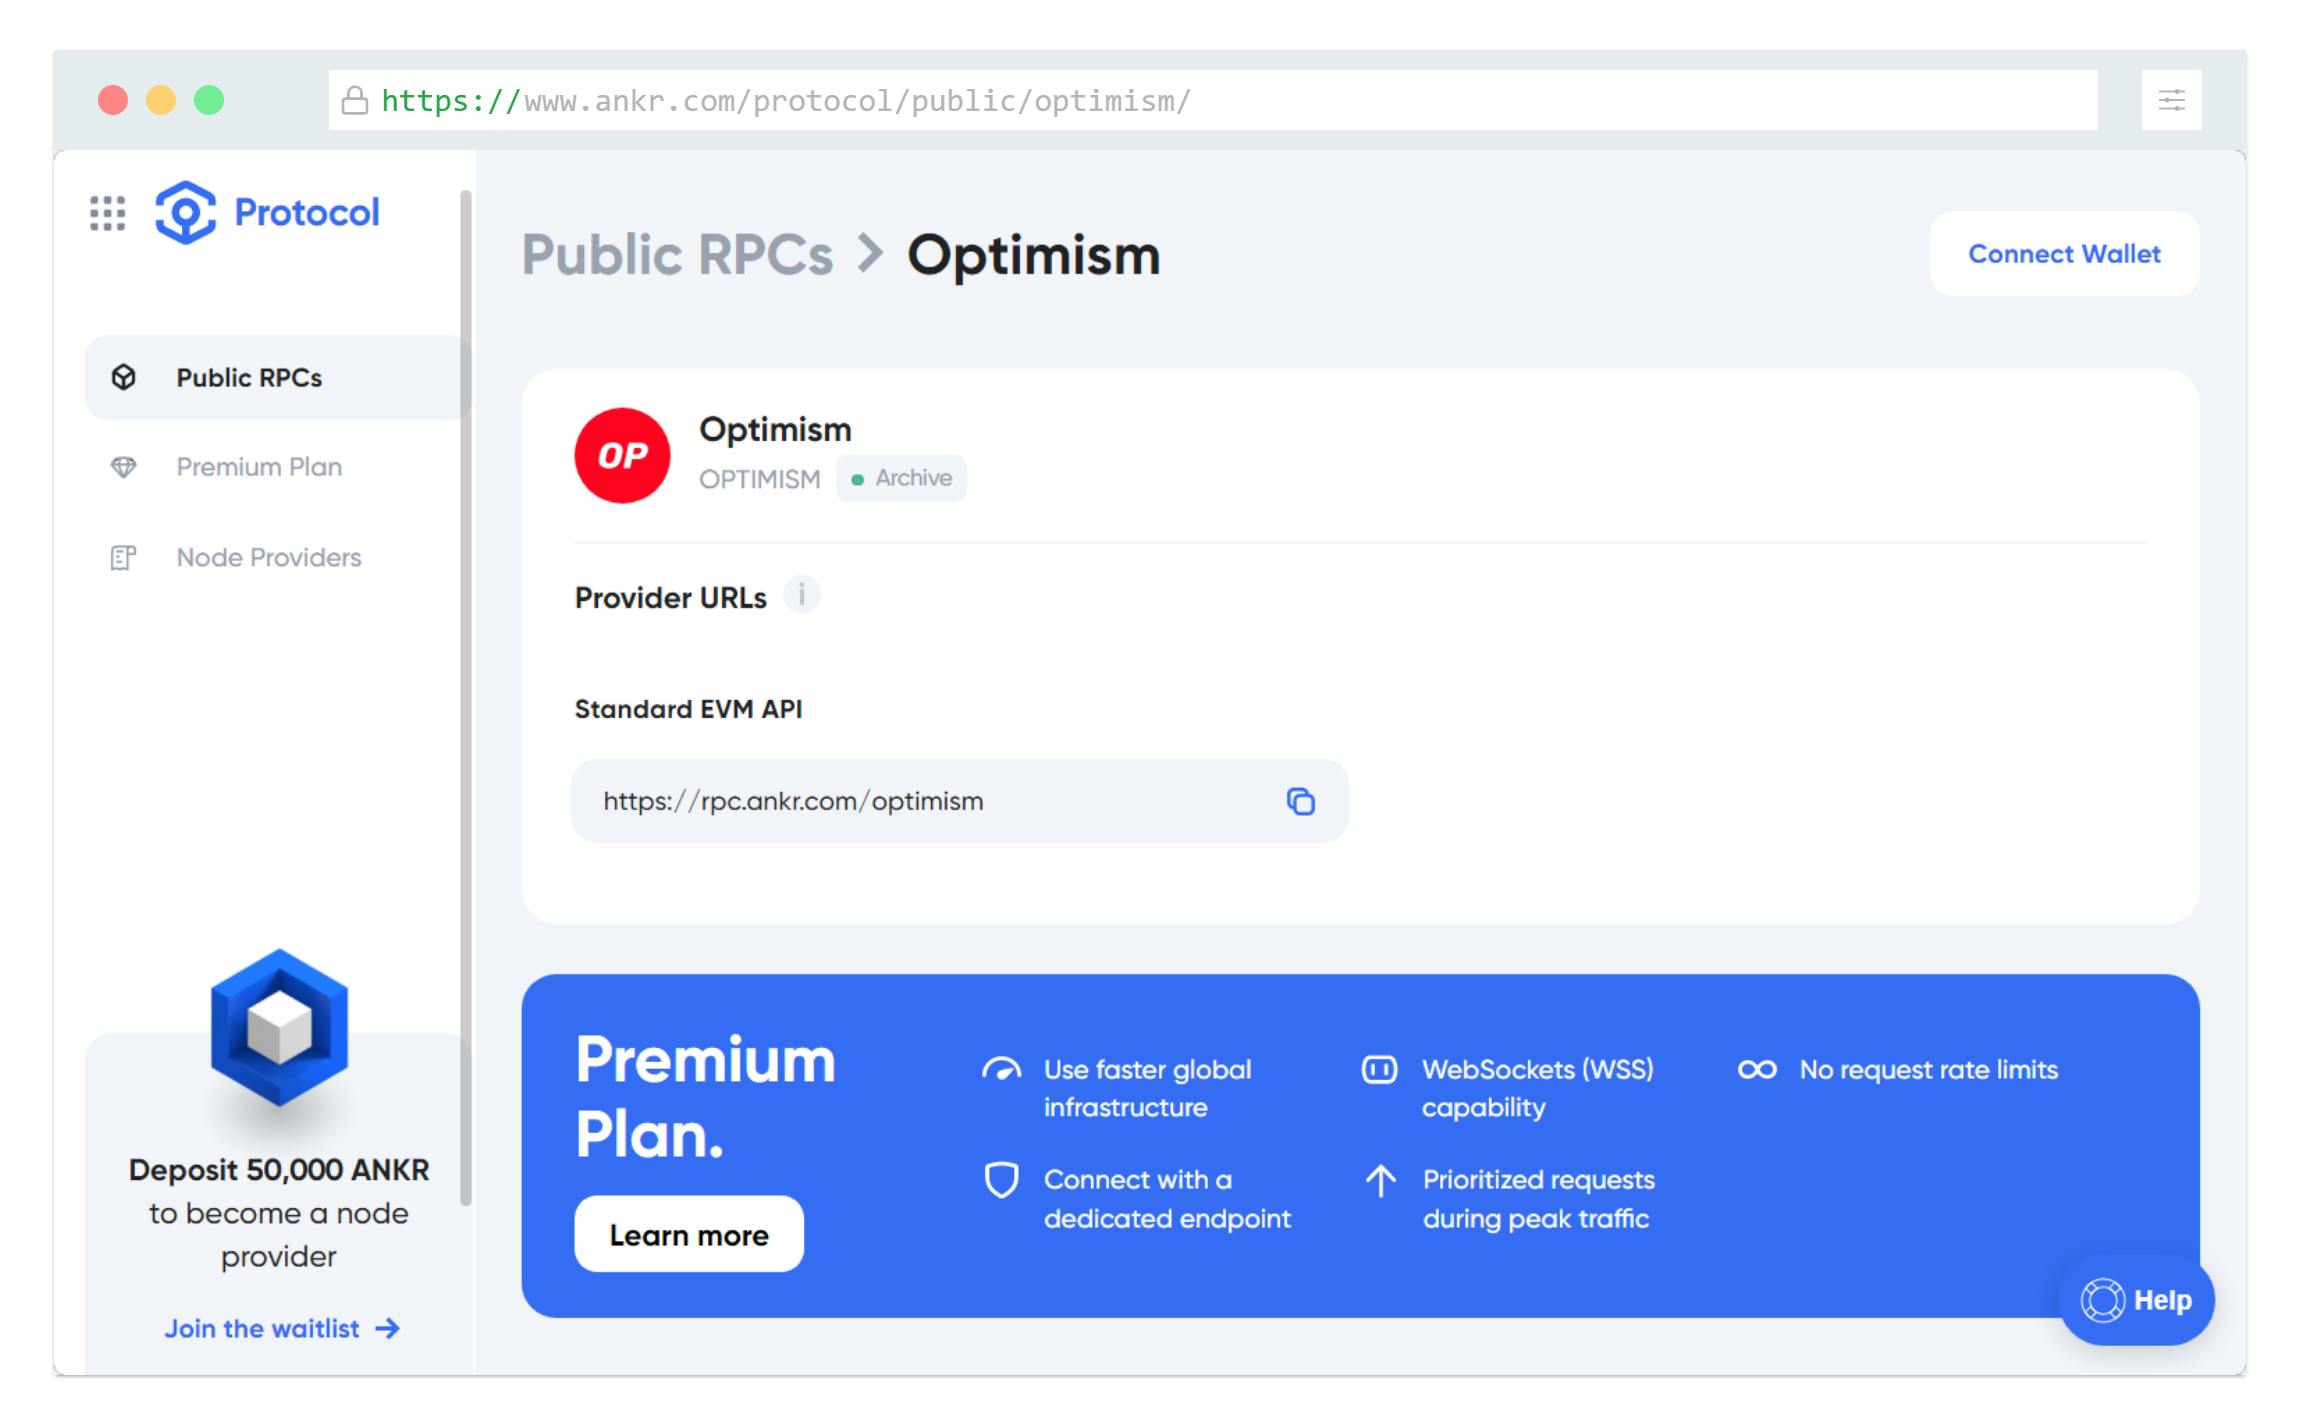
If you want to launch your ERC721 contract directly to mainnet, replace the RPC URL with Ankr's Public RPC -> rpc.ankr.com/optimism
Step 2: Add Test Ether from a Faucet
To request funds, go to Optimism Kovan Faucet↗ and sign in with GitHub to acquire some tokens. Wait a few moments and your wallet should be funded!
Note: ETH on testnets has no real value.
Step 3: Set Up Your Development Environment
To get started with the hardhat installation, we first need to set up our dev environment. To do so, create a new directory called erc721-token-mint.
- Now, initialize your new npm project in the
erc721-token-mintdirectory by running the following command in the terminal of your preferred code editor.
npm init
npm install dotenv
- Once your project is ready, install Hardhat, an Ethereum development environment for testing and deploying smart contracts to the blockchain.
It might take a minute or two to install everything!
npm install --save-dev hardhat
- Run
npx hardhatand choose "create an empty hardhat.config.js".
npx hardhat
Your project should now contain the following files and folders: hardhat.config.js, node_modules, package.json and package-lock.json.
- Next, we are going to create two new directories to house our smart contract and deployment script. To do so, enter the following commands:
mkdir contracts
mkdir scripts
- We will now install a Hardhat plugin that brings the Ethereum library ethers.js, which allows you to interact with the Ethereum blockchain in a simple way.
npm install --save-dev @nomiclabs/hardhat-ethers ethers
npm install --save-dev @openzeppelin/hardhat-upgrades
- Create a
.envfile in your project’s root folder and set the environment variable as follows. This is the private key of the account you intend to use on the Optimism Network from MetaMask.
PRIVATE_KEY = YOUR_PRIVATE_KEY
Step 4: Setup Hardhat Configs
Before setting up the hardhat.config.js file, we will need a gateway to communicate to the Ethereum blockchain. For that, we will be using the Kovan testnet RPC https://kovan.optimism.io/ provided by Optimism.
If you want to deploy your ERC-721 directly on the mainnet, you can use Ankr's Public RPC↗ for Optimism. Just copy the URL, no account or login is required!
Now you are ready to edit your hardhat.config.js with the following:
- Open the
hardhat.config.jsfile - Delete the code inside, and copy-paste the code below:
/**
* @type import('hardhat/config').HardhatUserConfig
*/
require('dotenv').config();
require("@nomiclabs/hardhat-ethers");

module.exports = {
   solidity: "0.8.1",
   defaultNetwork: "kovan",
   networks: {
      hardhat: {},
      kovan: {
         url: "https://kovan.optimism.io/",
         accounts: [`0x${process.env.PRIVATE_KEY}`]
      }
   },
}
Did you notice how we are sourcing the PRIVATE_KEY variable in this file? We are loading them up from process.env using the dotenv library we installed while setting up the dev environment.
Step 5: Write ERC-721 Smart Contract
We will use an ERC-721 standard based on OpenZepplin. OpenZepplin↗️ is an open-source standard for securing blockchain applications and provides security products to build, automate, and operate dApps.
- For this, we will install the OpenZepplin's contracts library.
npm install @openzeppelin/contracts
- Now navigate to the
contractsfolder and create a new file calledKittyMonster.sol - Below is our NFT smart contract code based on the OpenZeppelin's ERC721 implementation. Copy and paste the contents below into your
KittyMonster.solfile.
// SPDX-License-Identifier: MIT
//Declare the version of solidity to compile this contract.
//This must match the version of solidity in your hardhat.config.js file
pragma solidity ^0.8.1;

//inherits three OpenZepplin smart contract classes

//contains implementation of ERC721
import "@openzeppelin/contracts/token/ERC721/extensions/ERC721URIStorage.sol";

//provides counters that can only be incremented or decremented by one
import "@openzeppelin/contracts/utils/Counters.sol";

//implements ownership in the contracts
import "@openzeppelin/contracts/access/Ownable.sol";

//This function instantiates the contract and
//classifies ERC721 for storage schema
contract KittyMonster is ERC721URIStorage, Ownable {

    //to keep track of the total number of NFTs minted
    using Counters for Counters.Counter;
    Counters.Counter private _tokenIds;

    //sets contract's name and symbol
    constructor() ERC721("KittyMonster", "KMON") {}

    //address recipient: address that will receive freshly minted NFT
    //tokenURI: describes the NFT's metadata
    function mintNFT(address recipient, string memory tokenURI)
        public onlyOwner
        returns (uint256)
    {
        _tokenIds.increment();

        uint256 newItemId = _tokenIds.current();
        _mint(recipient, newItemId);
        _setTokenURI(newItemId, tokenURI);

        return newItemId;
    }
}
- Save the file and compile your contract to make sure everything is good to deploy using the command below:
npx hardhat compile

# output
# Compiled n Solidity file successfully
Step 6: Write the Deploy Script
Now that we've got our ERC-721 contract set up, let's create the deployment script.
- Navigate to the
scriptsfolder and create a new file calleddeploy.js - Open the
deploy.jsfile and copy-paste the following code:
async function main() {
    // Grab the contract factory
    //used to deploy new smart contracts
    const KittyMonster = await ethers.getContractFactory("KittyMonster");

    // Start deployment, returning a promise that resolves to a contract object
    const KMONS = await KittyMonster.deploy(); // Instance of the contract
    console.log("Contract deployed to address:", KMONS.address);
 }

 main()
   .then(() => process.exit(0))
   .catch(error => {
     console.error(error);
     process.exit(1);
   });
- Save and close the file
- Run
npx hardhat run scripts/deploy.js --network kovan
npx hardhat run scripts/deploy.js --network kovan
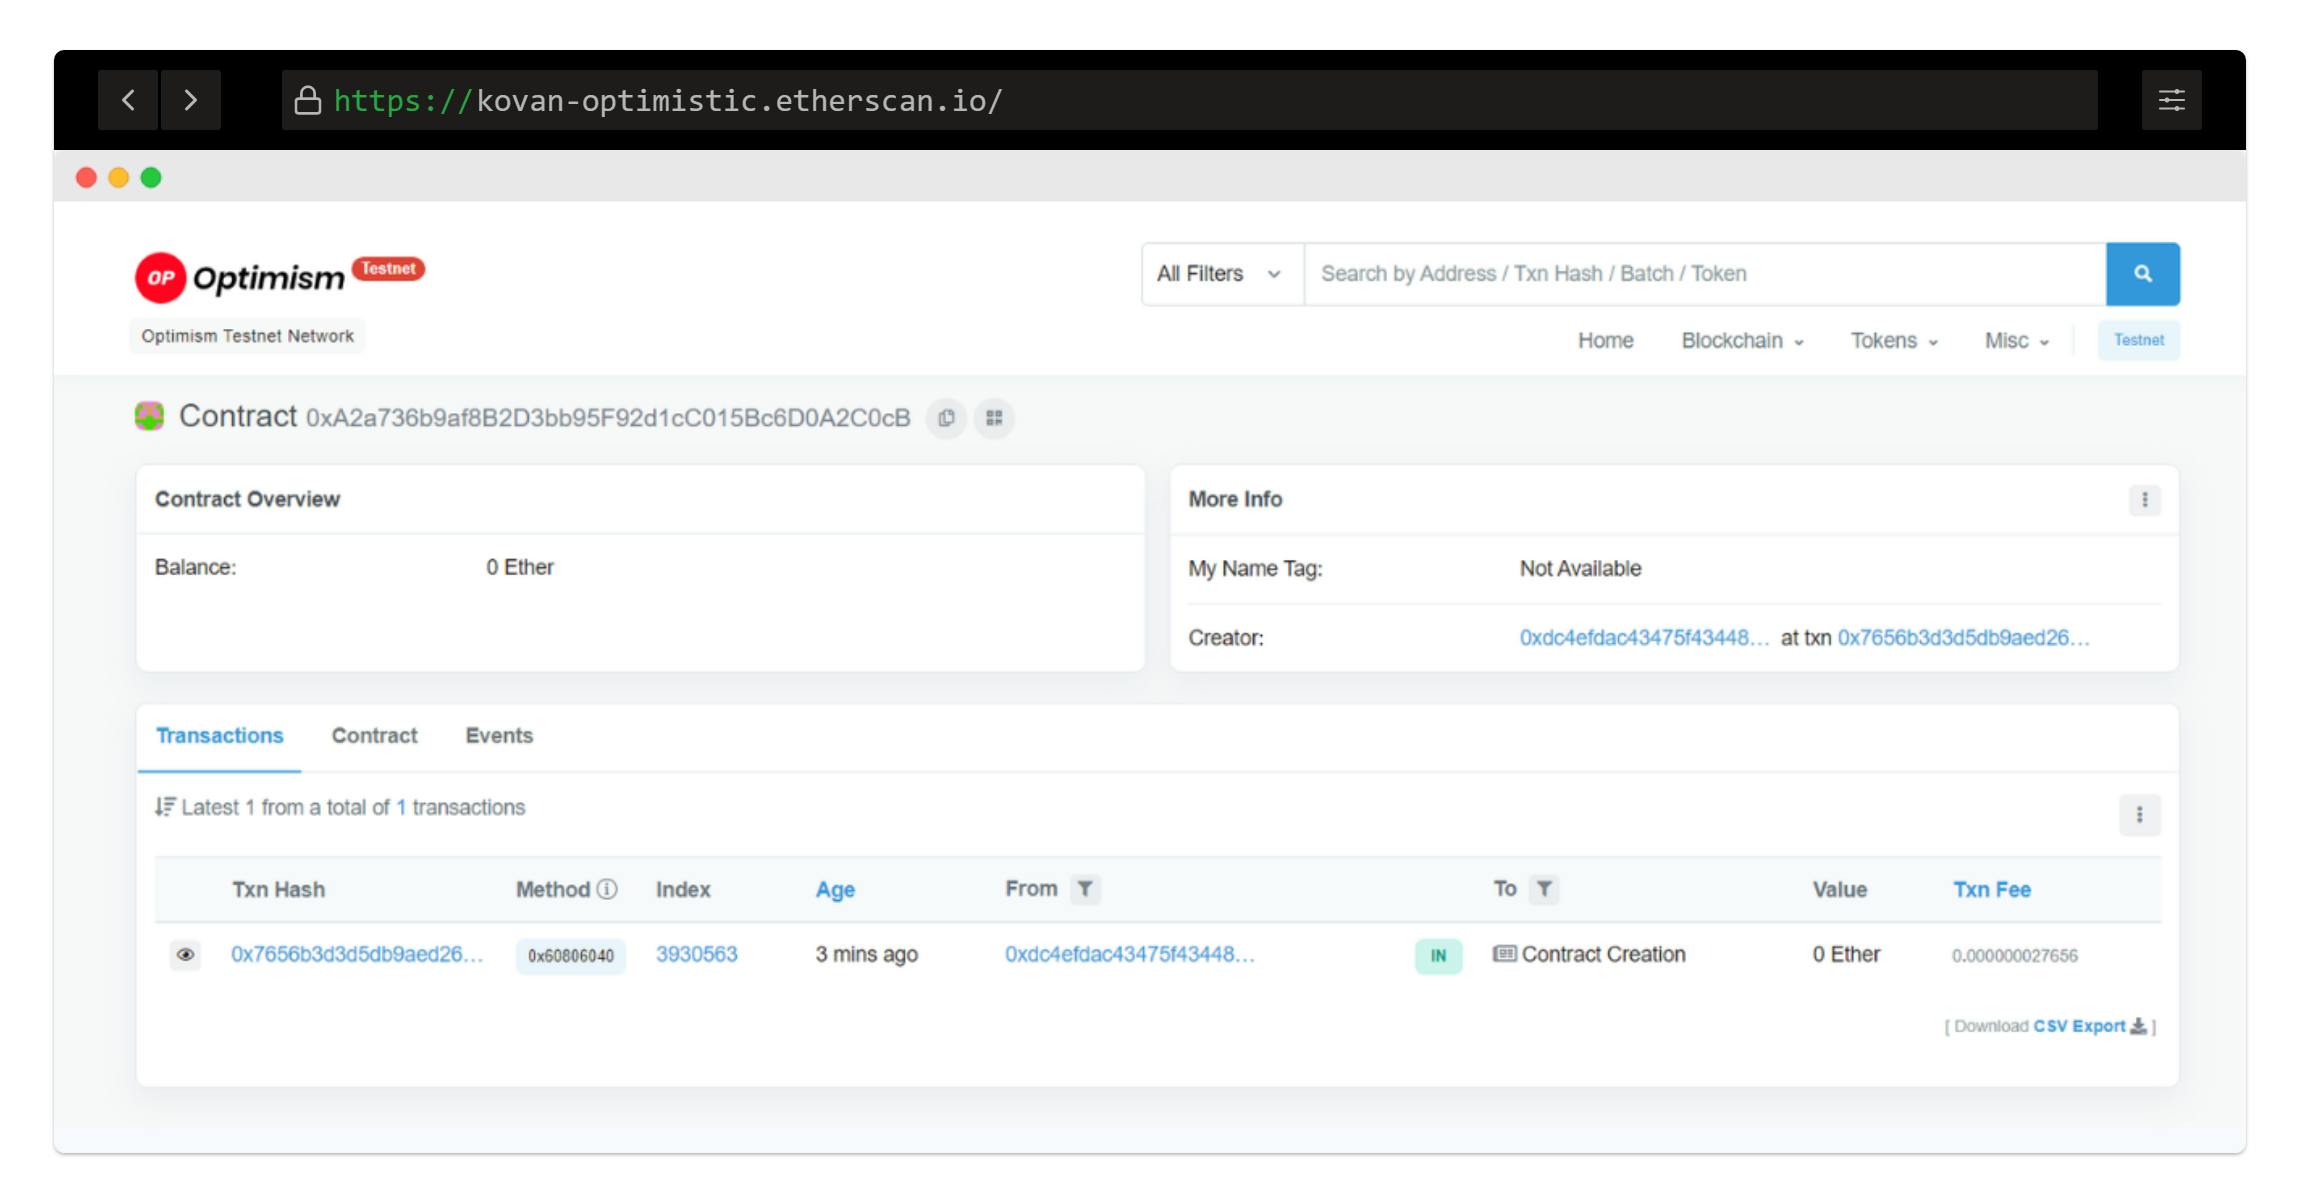
Output: Contract deployed to address: 0xA2a736b9af8B2D3bb95F92d1cC015Bc6D0A2C0cB
Running the above command will compile the contract and deploy it to the Optimism Kovan Testnet.
- If you go to the Kovan Optimism Etherscan↗ and search for your contract address, you should be able to see that the contract has been successfully deployed.
Step 7: Flattening the Solidity File
To update token information on Etherscan, the token contract address for the token must be verified. As contract owners, we can verify our contract by following the steps below. But before that, we will require to flatten the solidity file using Hardhat.
- To do so, within your project directory, run the following command on your terminal:
npx hardhat flatten > flattened.solflattened.solfile which contains the contract(s) code and all its dependencies, which we will copy and paste to the etherscan when verifying the contract.
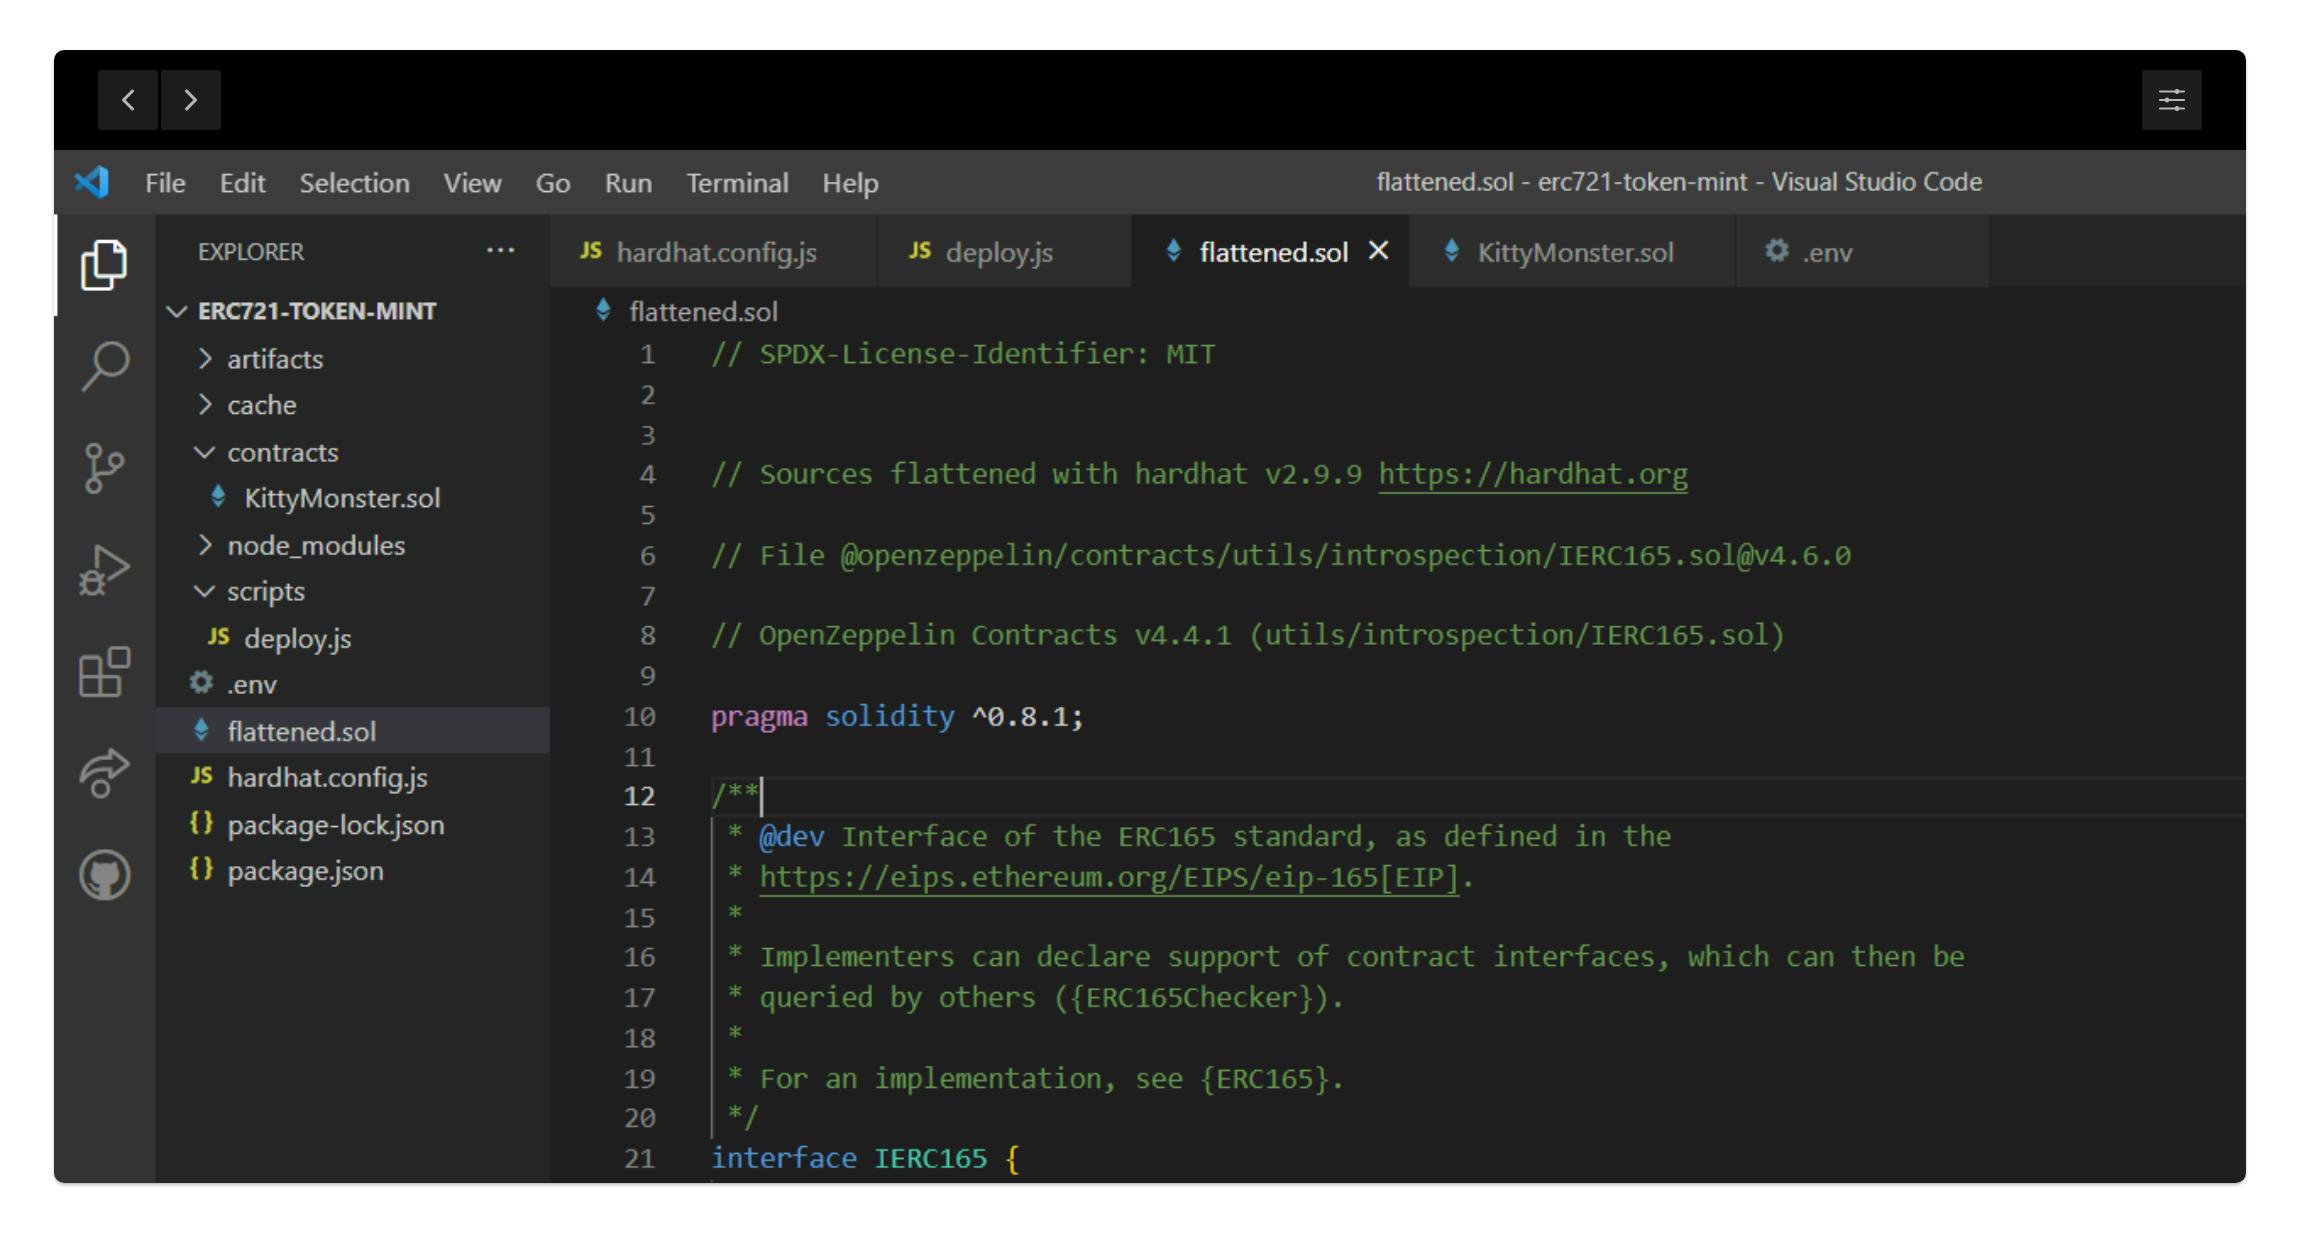
Make sure in your flattened.sol file, // SPDX-License-Identifier: MIT is only mentioned one time. Otherwise, it will throw you an error.
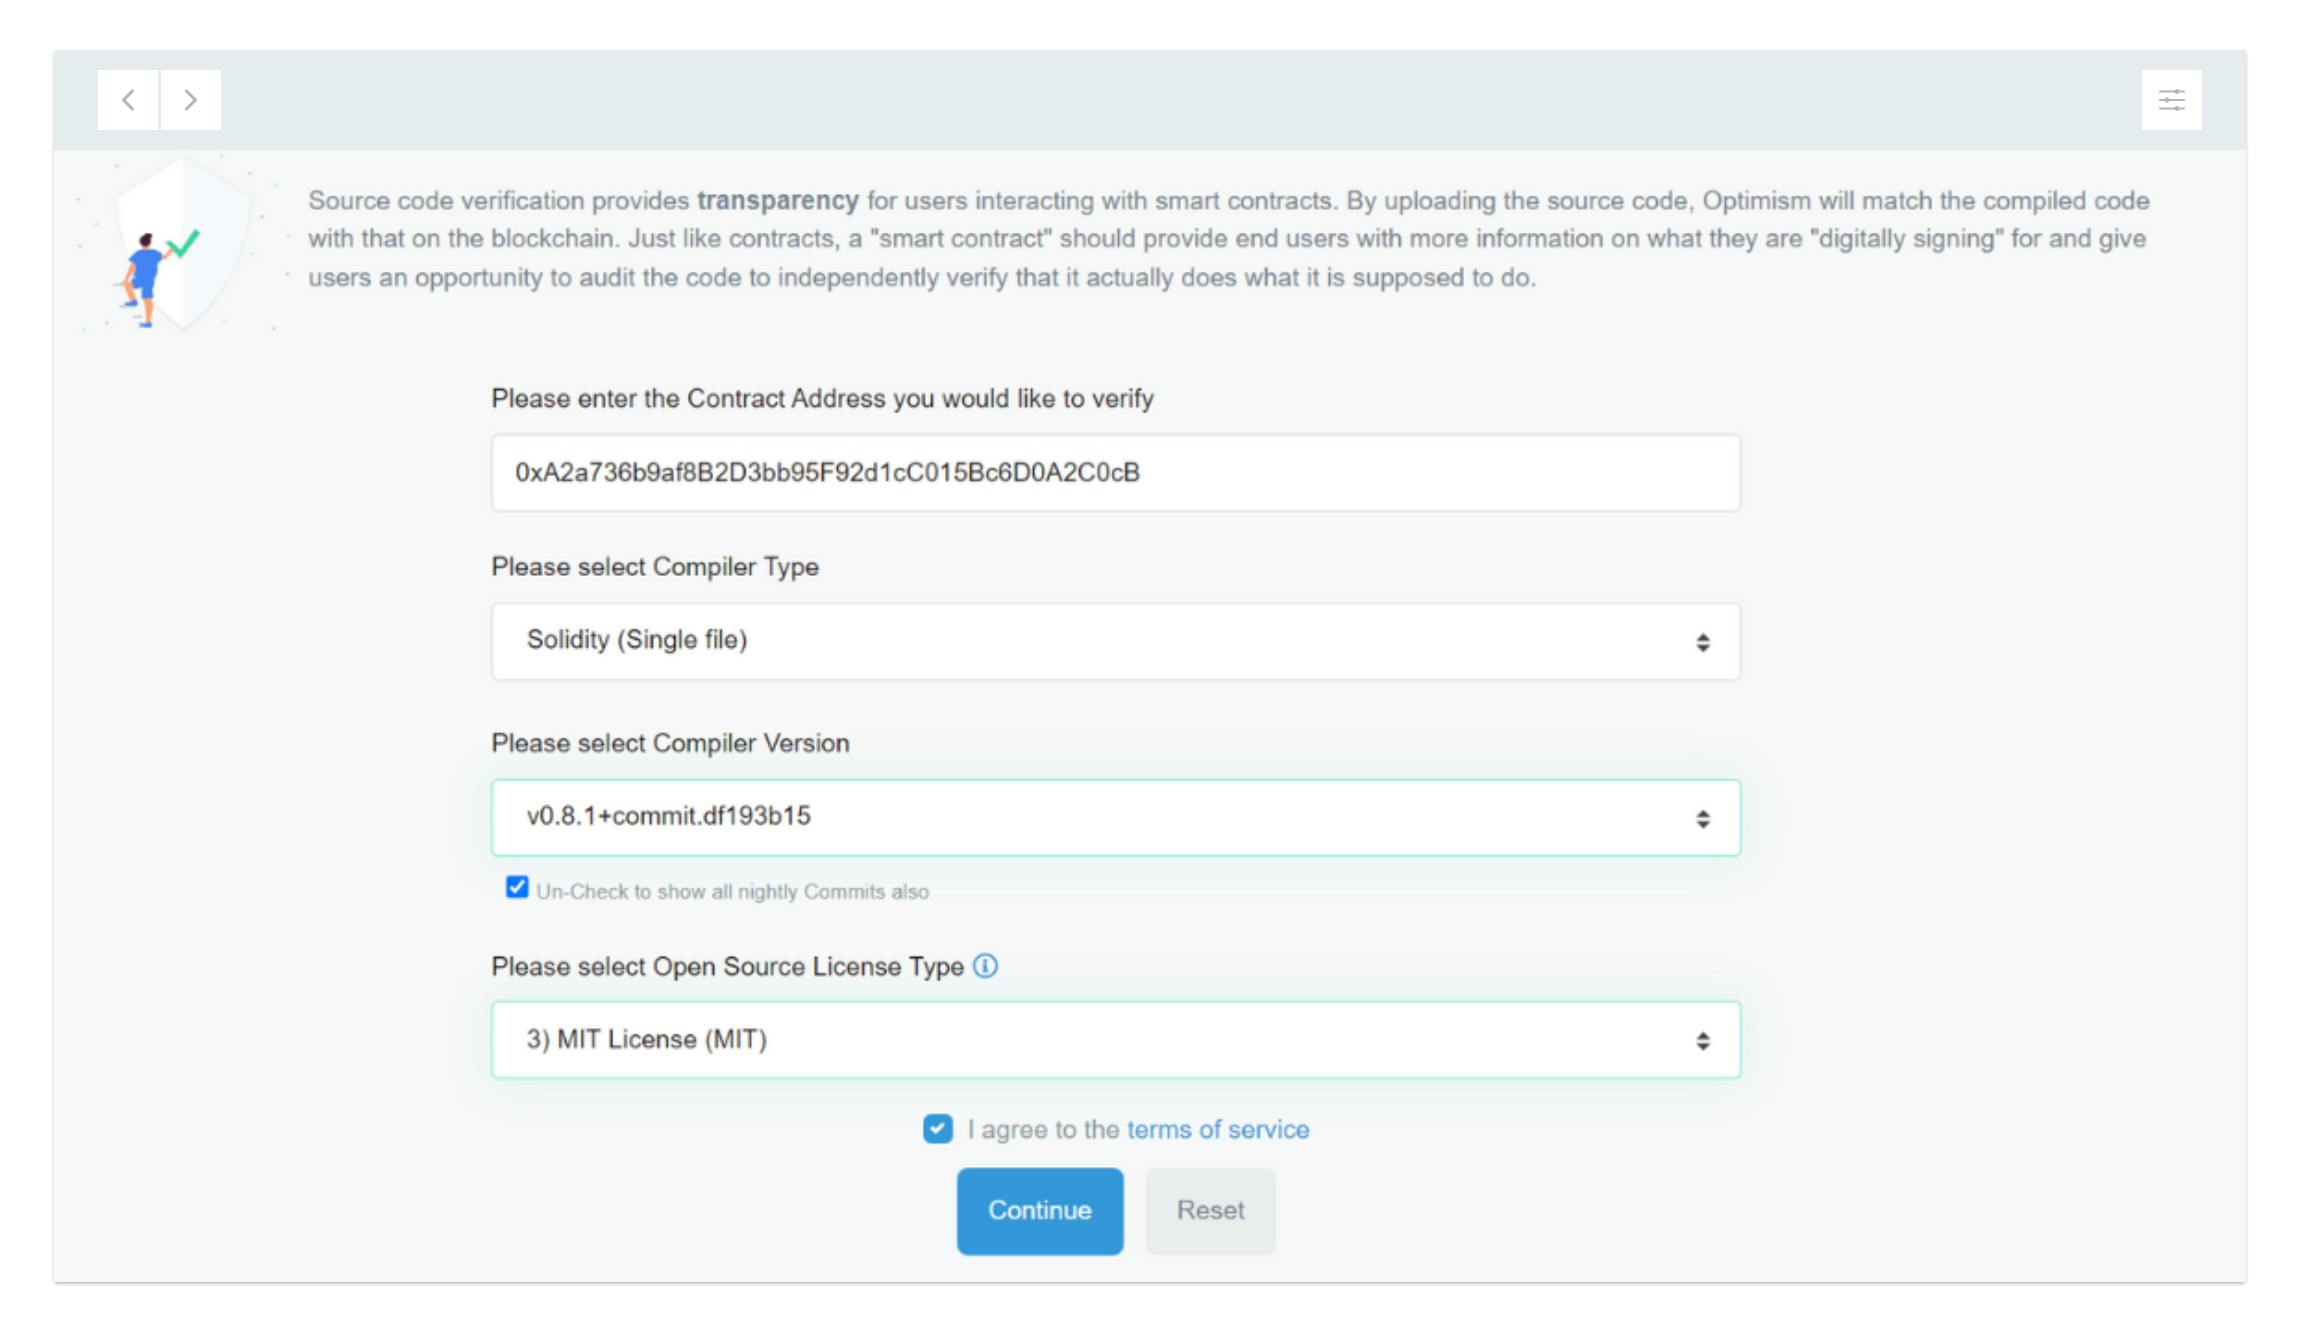
Step 8: Verifying the Contract on Optimism Kovan Etherscan
To verify the contract on Optimism Kovan Etherscan, follow the steps below:
Under the contract address, next to the
Transactiontab, you will be able to find the “Contract” tab. Then click on “Verify And Publish” and you'll land onVerify and Publish Contract Source Codepage.From the drop-down for compiler type, version selection and license type, select the following configs:
- Hit "continue" and under
Enter the Solidity Contract Code belowsection, copy and paste the entire code from theflattened.solfile that we generated in step 7. - Click
Verify and Publishand you be able to see that your contract is successfully verified on Optimism Kovan Etherscan.
When the contract has been verified, the “Code” page will be filled with the contract details. The source code of the contract is now publicly available on Etherscan.
Step 9: Adding NFT Asset to IPFS | Pinata
We’re going to use Pinata to store our NFT asset and JSON metadata to IPFS so that we can pass it through to our token contract (remember tokenURI parameter from our mintNFT function in the smart contract?).
If you don’t have a Pinata account, sign up↗ for a free account here and complete the steps to verify your email.
- Once you have verified your account on the Pinata, navigate to the "My Files" page and click the "Upload" button.
- Upload your NFT art and you'll see your image asset file under the
Filespage along with the CID column.
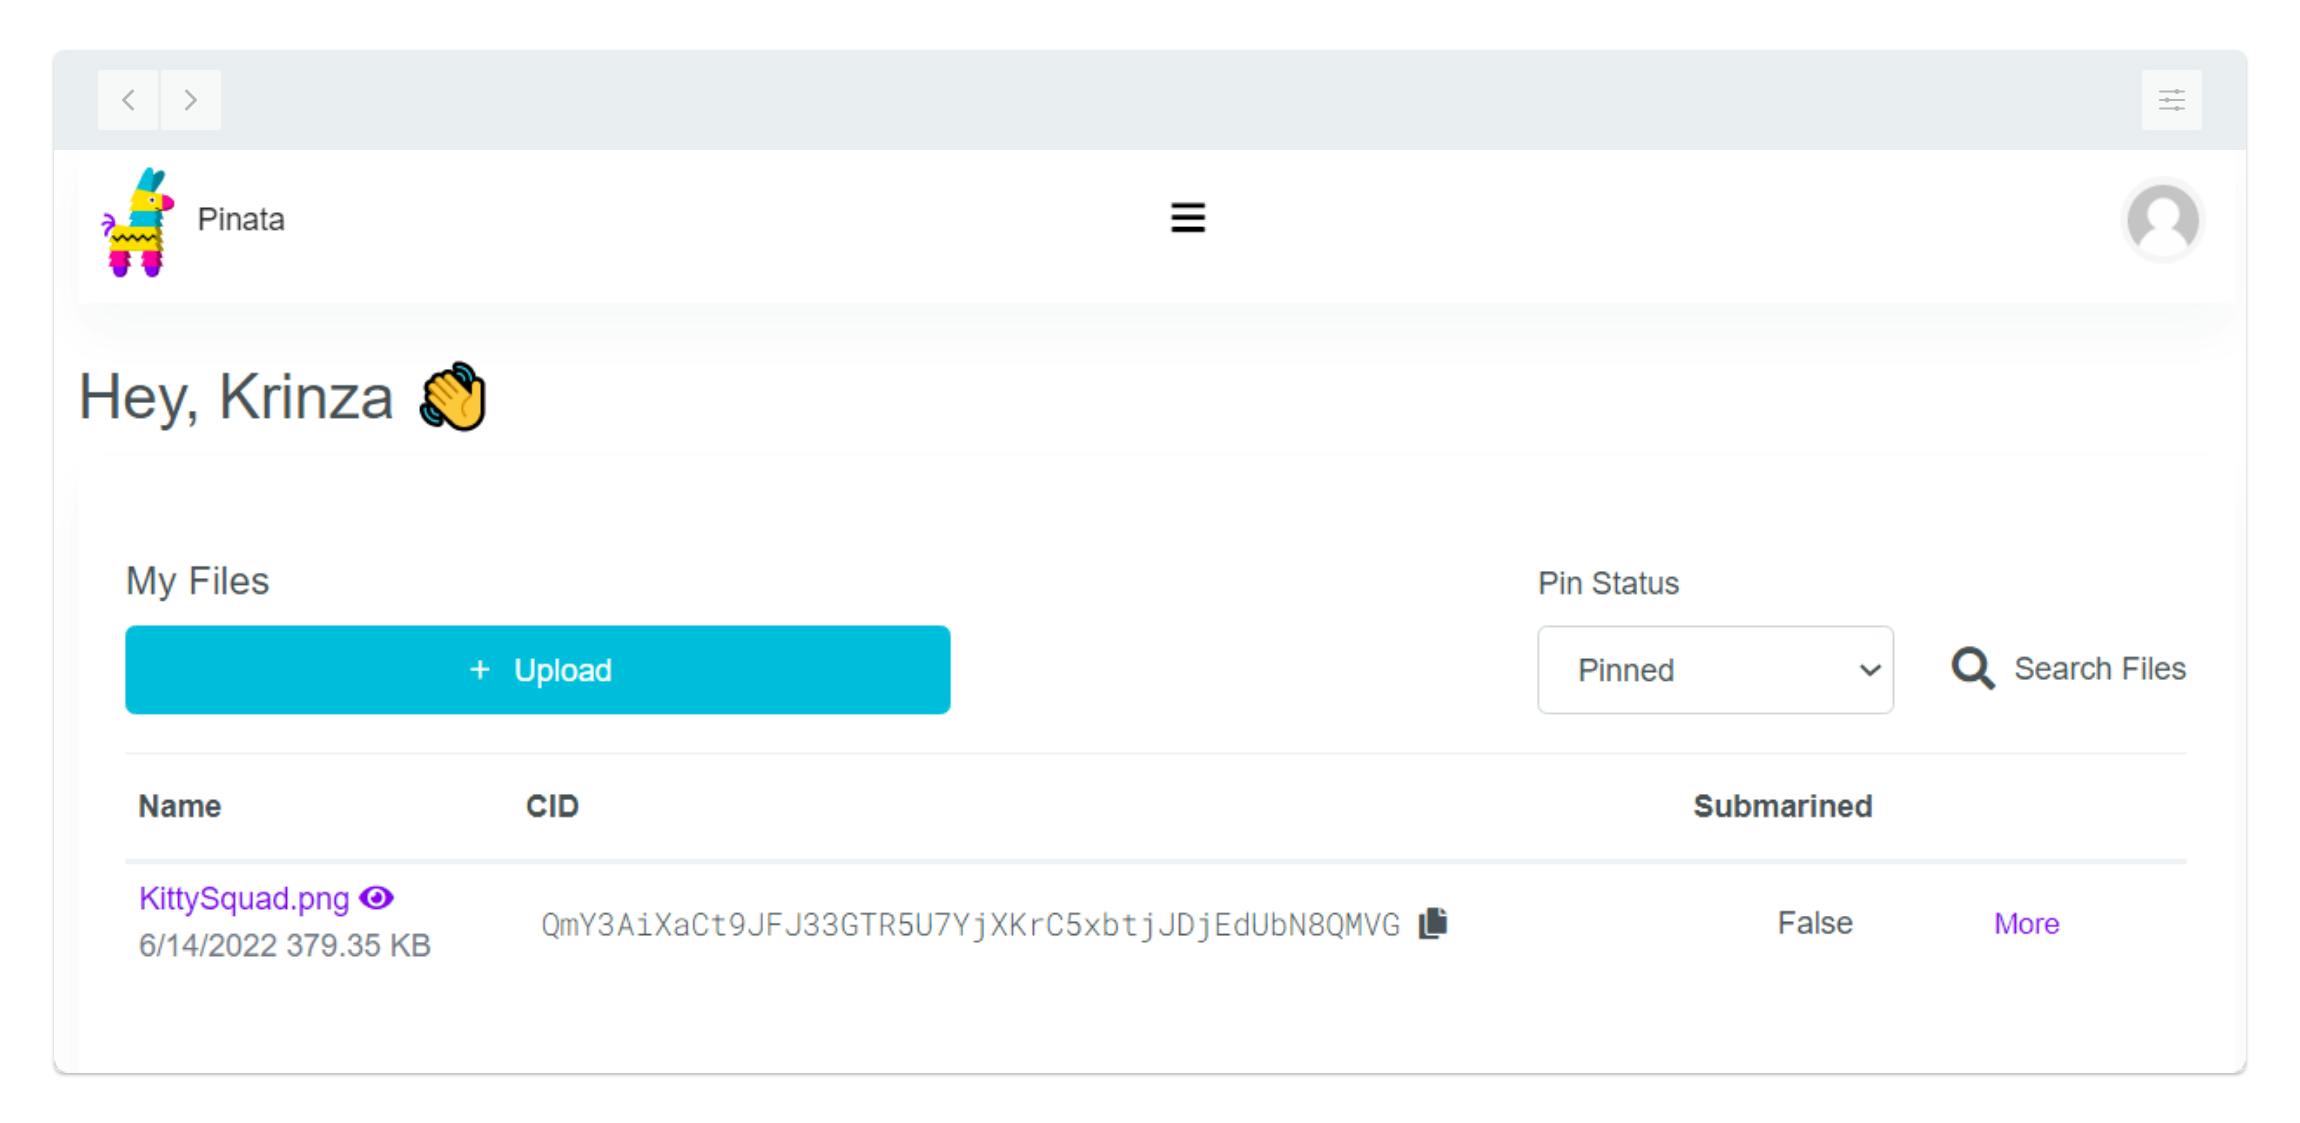
- Copy the CID by clicking the copy button next to it and use it as a postfix to this URL "gateway.pinata.cloud/ipfs" to view your NFT art.
Here's the image↗ that I used.
Now, we’re going to upload one more document to Pinata - JSON metadata. To do that, follow the steps below:
- In your code's root directory, make a new file called
monstermeta.jsonand add the code given below to the JSON file.
{
    "attributes" : [ {
      "trait_type" : "Monster",
      "value" : "Dybbuk"
    }, {
      "trait_type" : "Space",
      "value" : "Fire"
    } ],
    "description" : "not cryptokitties.",
    "image" : "https://gateway.pinata.cloud/ipfs/QmY3AiXaCt9JFJ33GTR5U7YjXKrC5xbtjJDjEdUbN8QMVG",
    "name" : "Kabbey"
}
Feel free to add or remove the attributes. Also, make sure you are providing your IPFS image URL - otherwise, you will mint Kabbey too!!
- Once you’re done editing the JSON file, save it and upload it to Pinata, following the same steps we followed for uploading the image and copy the CID for the JSON file (we will need that in the next step).
Step 10: Minting NFT
- To mint the NFT, navigate under the contract address page, next to the
Transactiontab, you will find the “Contract” tab. - Click on “Write Contract” and "connect to Web3"
- Under
mintNFT, input your wallet's public address inrecipient (address)and CID for the JSON file you uploaded to the Pinata. - Hit "write", and you can view your transaction successfully executed in the Optimism Kovan Etherscan.
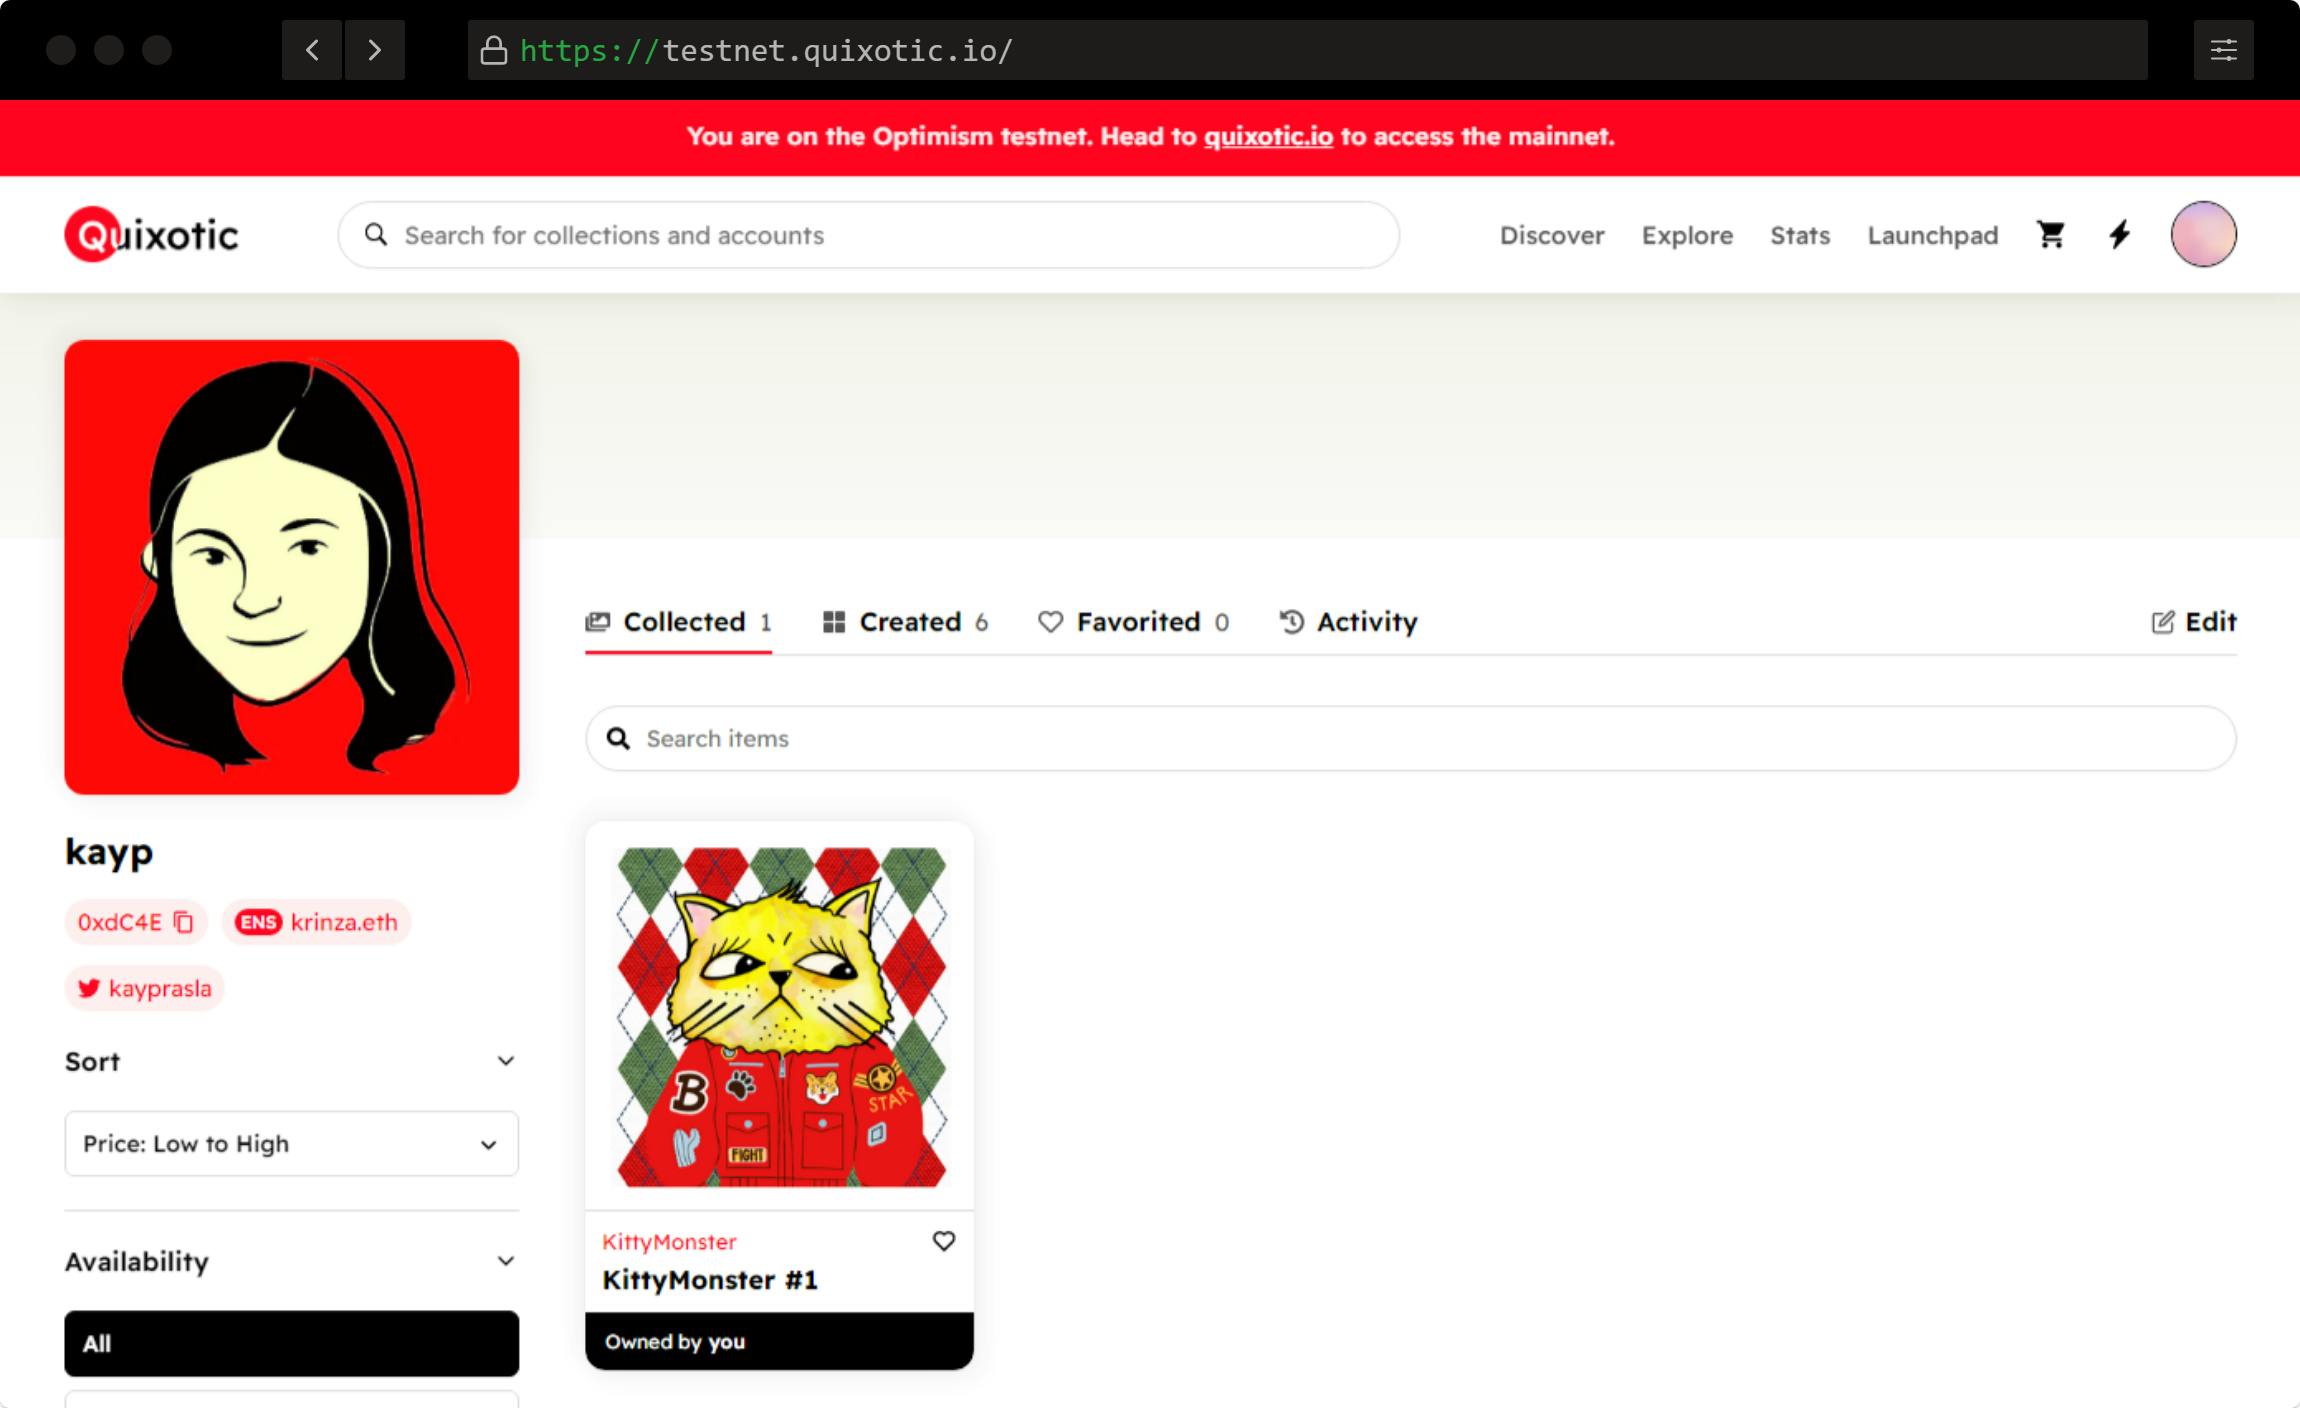
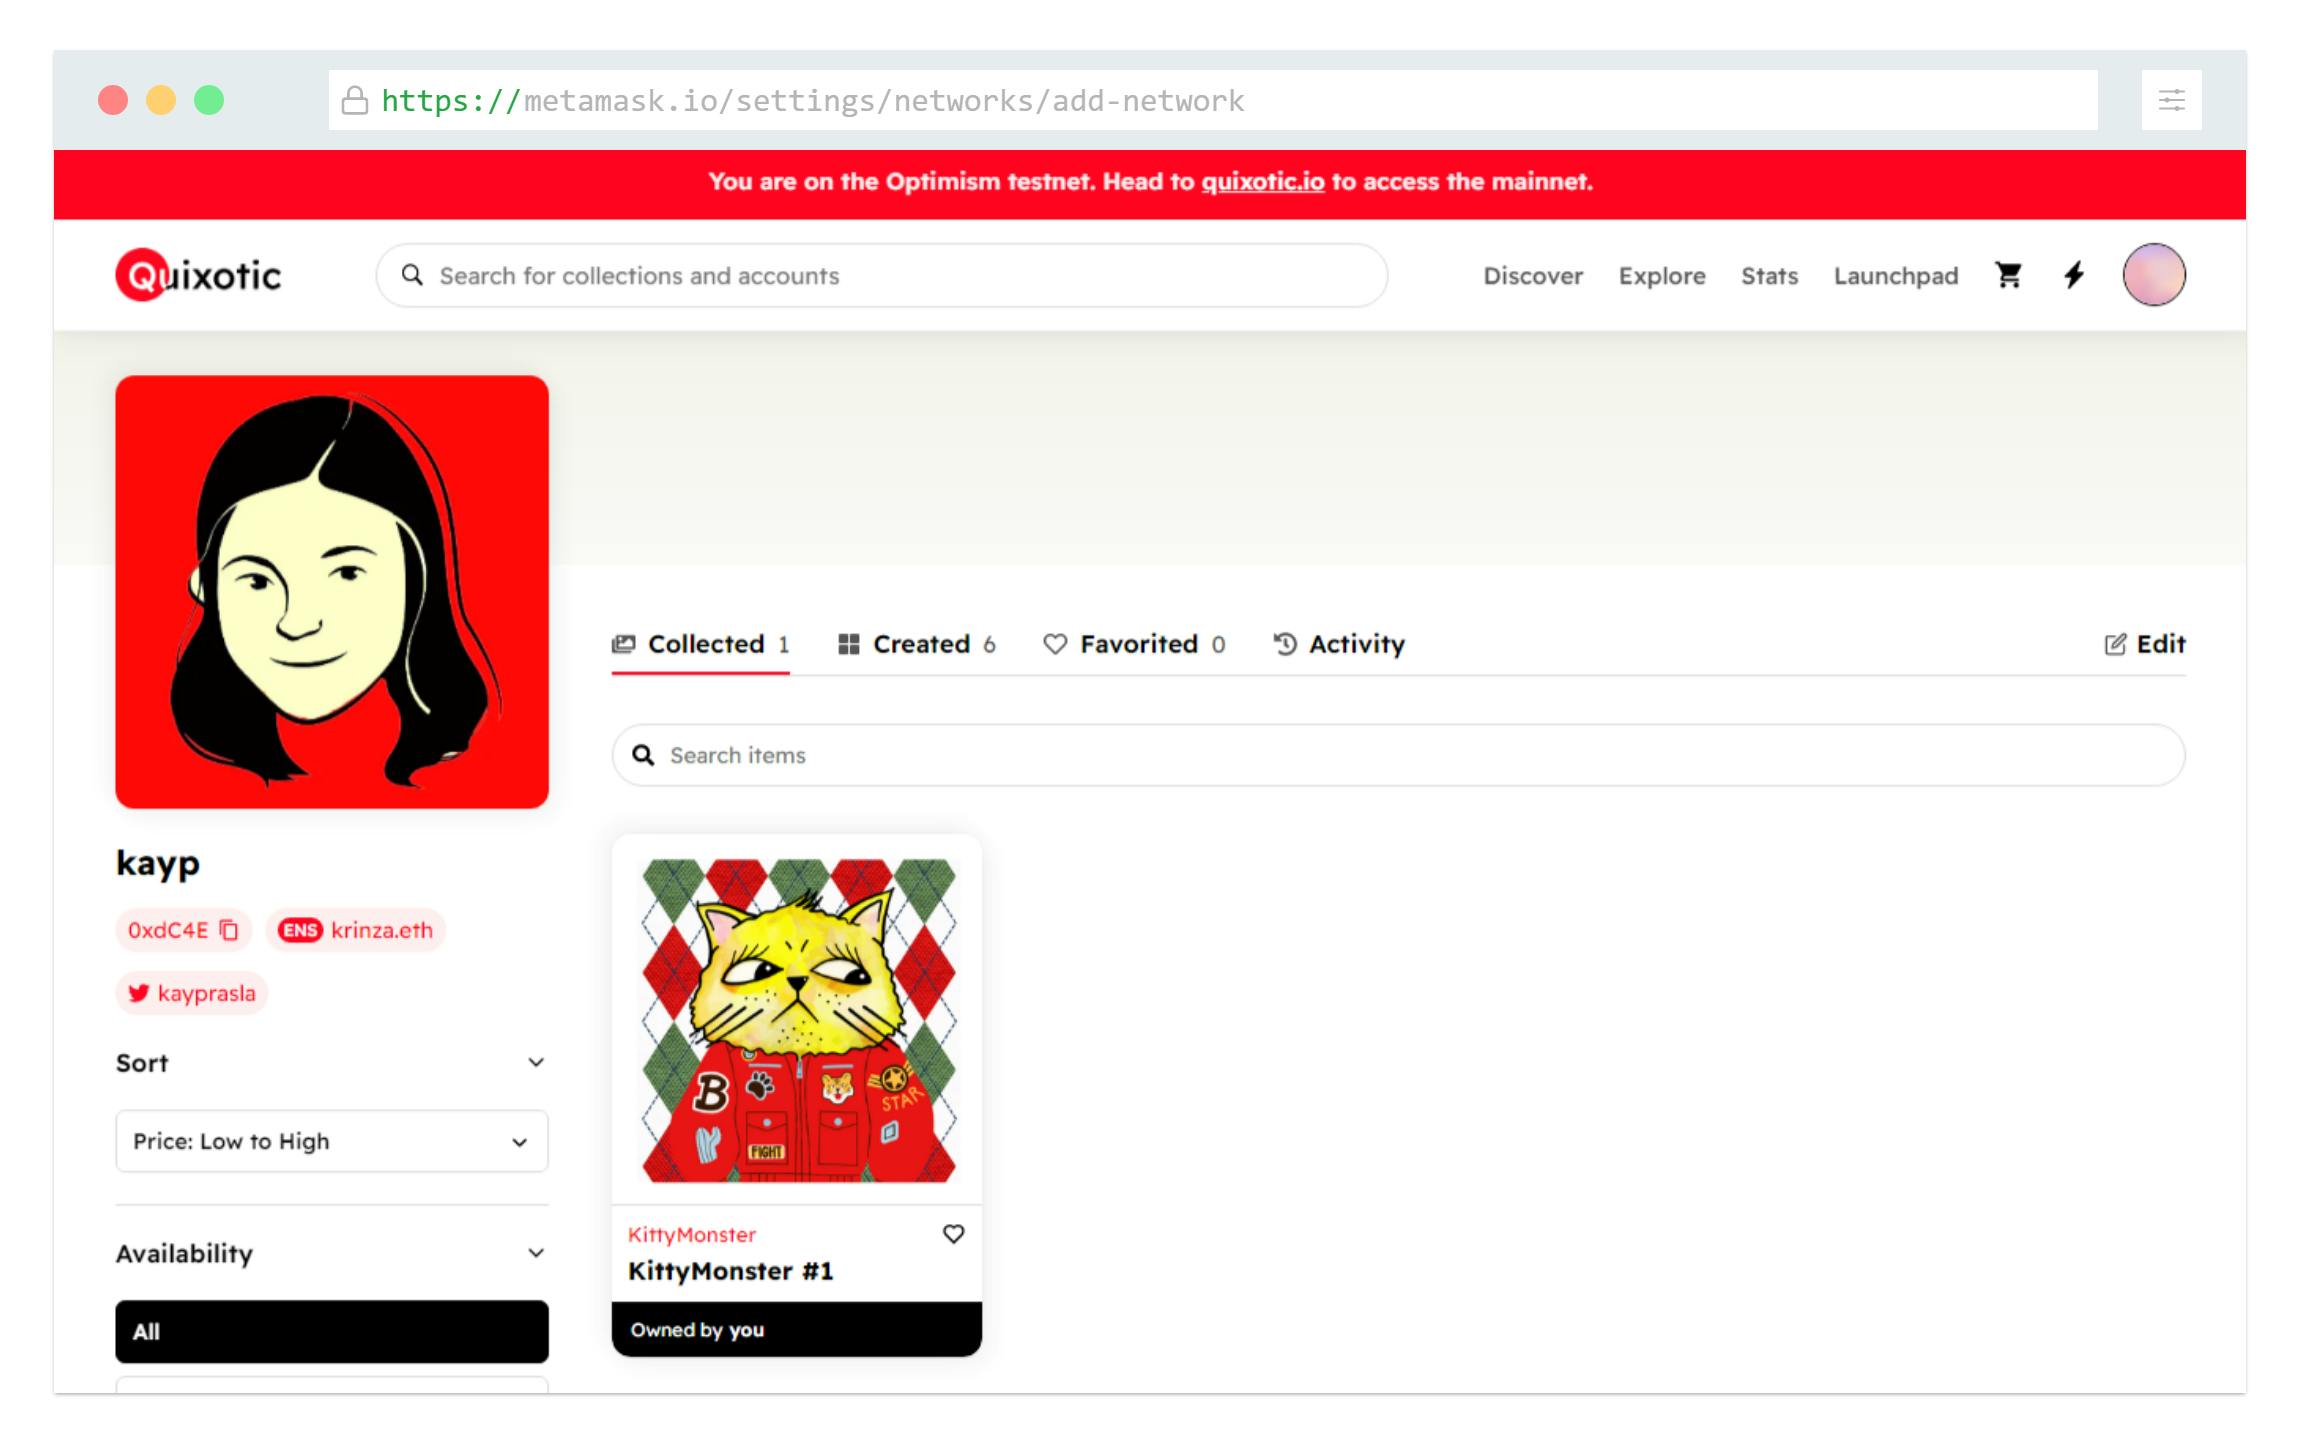
Now, we will head to Quixotic.io↗, an NFT marketplace for Optimism.
- Connect your wallet to Quicotic's testnet marketplace and you'll be able to view your minted NFT there!
Check the GitHub Repo
If you followed along with the tutorial, awesome! Here you can find the GitHub repository with the full code.
Next Steps
If you are up for a challenge, build a full-stack dApp to mint, display and transfer NFTs to your friends and make sure you drop the project links in the comments section.
If you have any cool idea you want to discuss, drop me a "👋" on Twitter @kayprasla or find me in the Developer DAO discord!