

How to Deploy Your First Polygon NFT with an ERC-721 Solidity Smart Contract and Ankr


If you’re looking to learn how to deploy your first smart contract and mint your first NFT, you’ve come to the right place. This is a tutorial on how to deploy an ERC-721 smart contract with unlimited minting functionality to the Polygon main network using Ankr’s public RPC.
🧱 Prerequisites
- ☊ Node.js
- 🧵 Yarn
- 🖥 VS Code
- 🦊 MetaMask with ~1 MATIC on Polygon
🏗 Let’s Get Started
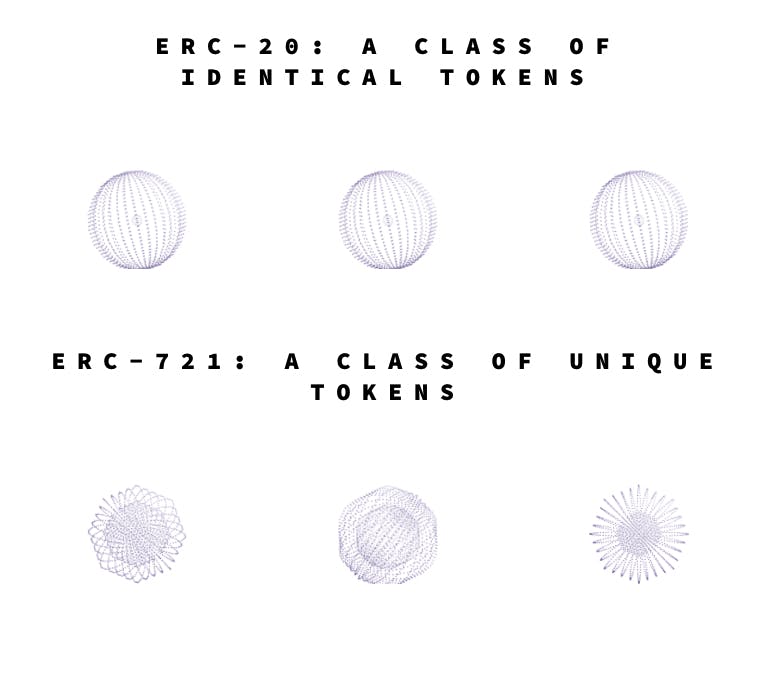
First, we will want to read about what an ERC-721 is. ERC-721 is the free and open standard that defines the schema for a non-fungible or unique token on Ethereum. ERC-20 tokens are fungible and each token is the same as another, whereas ERC-721 tokens are unique. You can also learn more at this link ➡️ ERC-721.
Ankr is a default provider for the Ethers.js library, which is a library for interacting with the Ethereum Blockchain. Learn more about the Ankr integration with Ethers.js here.
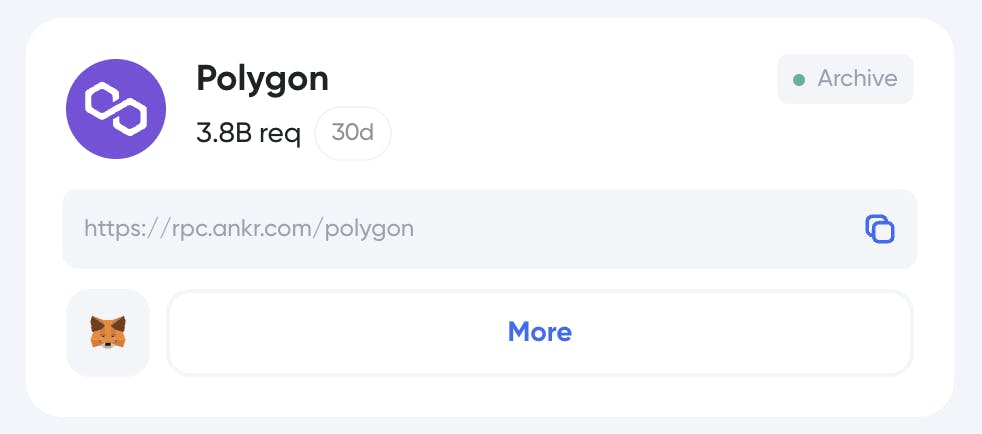
Add Polygon to your MetaMask wallet as a network at https://ankr.com/protocol/public by clicking the MetaMask button.
In your terminal, make a new directory called ankr-polygon-nft:
mkdir ankr-polygon-nft
Change directories into ankr-polygon-nft:
cd ankr-polygon-nft
Initialize the directory with npm:
npm init -y
Add the dependencies using Yarn:
yarn add dotenv hardhat @nomiclabs/hardhat-etherscan @openzeppelin/contracts
Initiate Hardhat, an Ethereum development environment for testing and deploying smart contracts to the blockchain.
Pick Create a basic sample project and select yes or press enter to the default values.
npx hardhat init;

# Expected output:
# yarn add v1.22.17
# info No lockfile found.
# [1/4] 🔍  Resolving packages...
# [2/4] 🚚  Fetching packages...
# [3/4] 🔗  Linking dependencies...
# [...]
# ├─ yargs-unparser@2.0.0
# ├─ yargs@16.2.0
# └─ yocto-queue@0.1.0
# ✨  Done in 10.37s.
Delete Greeter.sol in the Contracts folder and sample-script.js in the Scripts folder. You can also delete the Tests folder.
rm contract/Greeter.sol;
rm scripts/sample-script.js;
rm -rf tests;
Create a new file in Contracts called AnkrPolygonNFT.sol and add the following code:
// declares the type of license associated with the contract, in this case, an MIT license
// SPDX-License-Identifier: MIT

//declare the version of solidity to compile this contract. This must match the version of solidity in your `hardhat.config.js` file
pragma solidity ^0.8.0;

// import ERC721 URI storage extension standard and `Counters.sol` which will help set token IDs from OpenZepplin. OpenZepplin is an open-source standard for securing blockchain applications and provides security products to build, automate, and operate dApps
import "@openzeppelin/contracts/token/ERC721/extensions/ERC721URIStorage.sol";
import "@openzeppelin/contracts/utils/Counters.sol";
Now, we’ll write our contract ⬇️
// SPDX-License-Identifier: MIT
pragma solidity ^0.8.0;

import "@openzeppelin/contracts/token/ERC721/extensions/ERC721URIStorage.sol";
import "@openzeppelin/contracts/utils/Counters.sol";

// @dev This function instantiates the contract for AnkrPolygonNFT and classifies ERC-721 for storage schema
contract AnkrPolygonNFT is ERC721URIStorage {

/* @dev Set up our counters
* @param Counters will create unique TokenIds for each mint of the ERC-721 token
* @return This will return the current TokenId
*/
    using Counters for Counters.Counter;

/* @dev Store our counter
* @param The TokenId will be stored based on the current count
* @return This will store the current TokenId
*/
    Counters.Counter private _tokenIds;

// pass arguments for name and symbol
/* @dev Set the name and token tracker for our contract
* @param AnkrPolygonNFT will be the name of the ERC-721 token, and ANKRPG will be the token tracker
* @return This will name the token each time it is minted
*/
    constructor() ERC721("AnkrPolygonNFT", "ANKRPG") {}

/* @dev This will set the mint function for the token with the URI specified
* @param tokenURI specifies the schema and
* @return This will set the name, image, description, and properties
*/
    function mint(string memory tokenURI) public returns (uint256){

// increment the tokenId by one
        _tokenIds.increment();

// fetch the current tokenId and set the new tokenId
        uint256 newItemId = _tokenIds.current();

/* @dev Set the token owner by retrieving the address from msg.sender
* @param msg.sender is the wallet address and newItemId is current tokenId
* @return Owner of ERC-721 and tokenId
*/
        _safeMint(msg.sender, newItemId);

/* @dev Set the token URI and new TokenId
* @param newItemId is current tokenId and new tokenURI
* @return Current TokenId and tokenURI
*/
        _setTokenURI(newItemId, tokenURI);

// return current newItemId for the ERC-721 token
        return newItemId;
    }
}
Next, clear your hardhat.config.js file and add the following:
require("dotenv").config();
require("@nomiclabs/hardhat-waffle");
require("@nomiclabs/hardhat-etherscan");

module.exports = {
  solidity: "0.8.4",
};
You can now specify the network, account and polygonscan key in module.exports. Then, go to ankr.com/protocol/public and copy the RPC for Polygon: https://rpc.ankr.com/polygon
// imports

module.exports = {
  solidity: "0.8.4",
  networks: {
    matic: {
      url: "https://rpc.ankr.com/polygon",
      accounts: [process.env.WALLET_PRIVATE_KEY],
    },
  },
  etherscan: {
    apiKey: process.env.POLYGONSCAN_API_KEY,
  },
};
Create a .env file in your root directory.
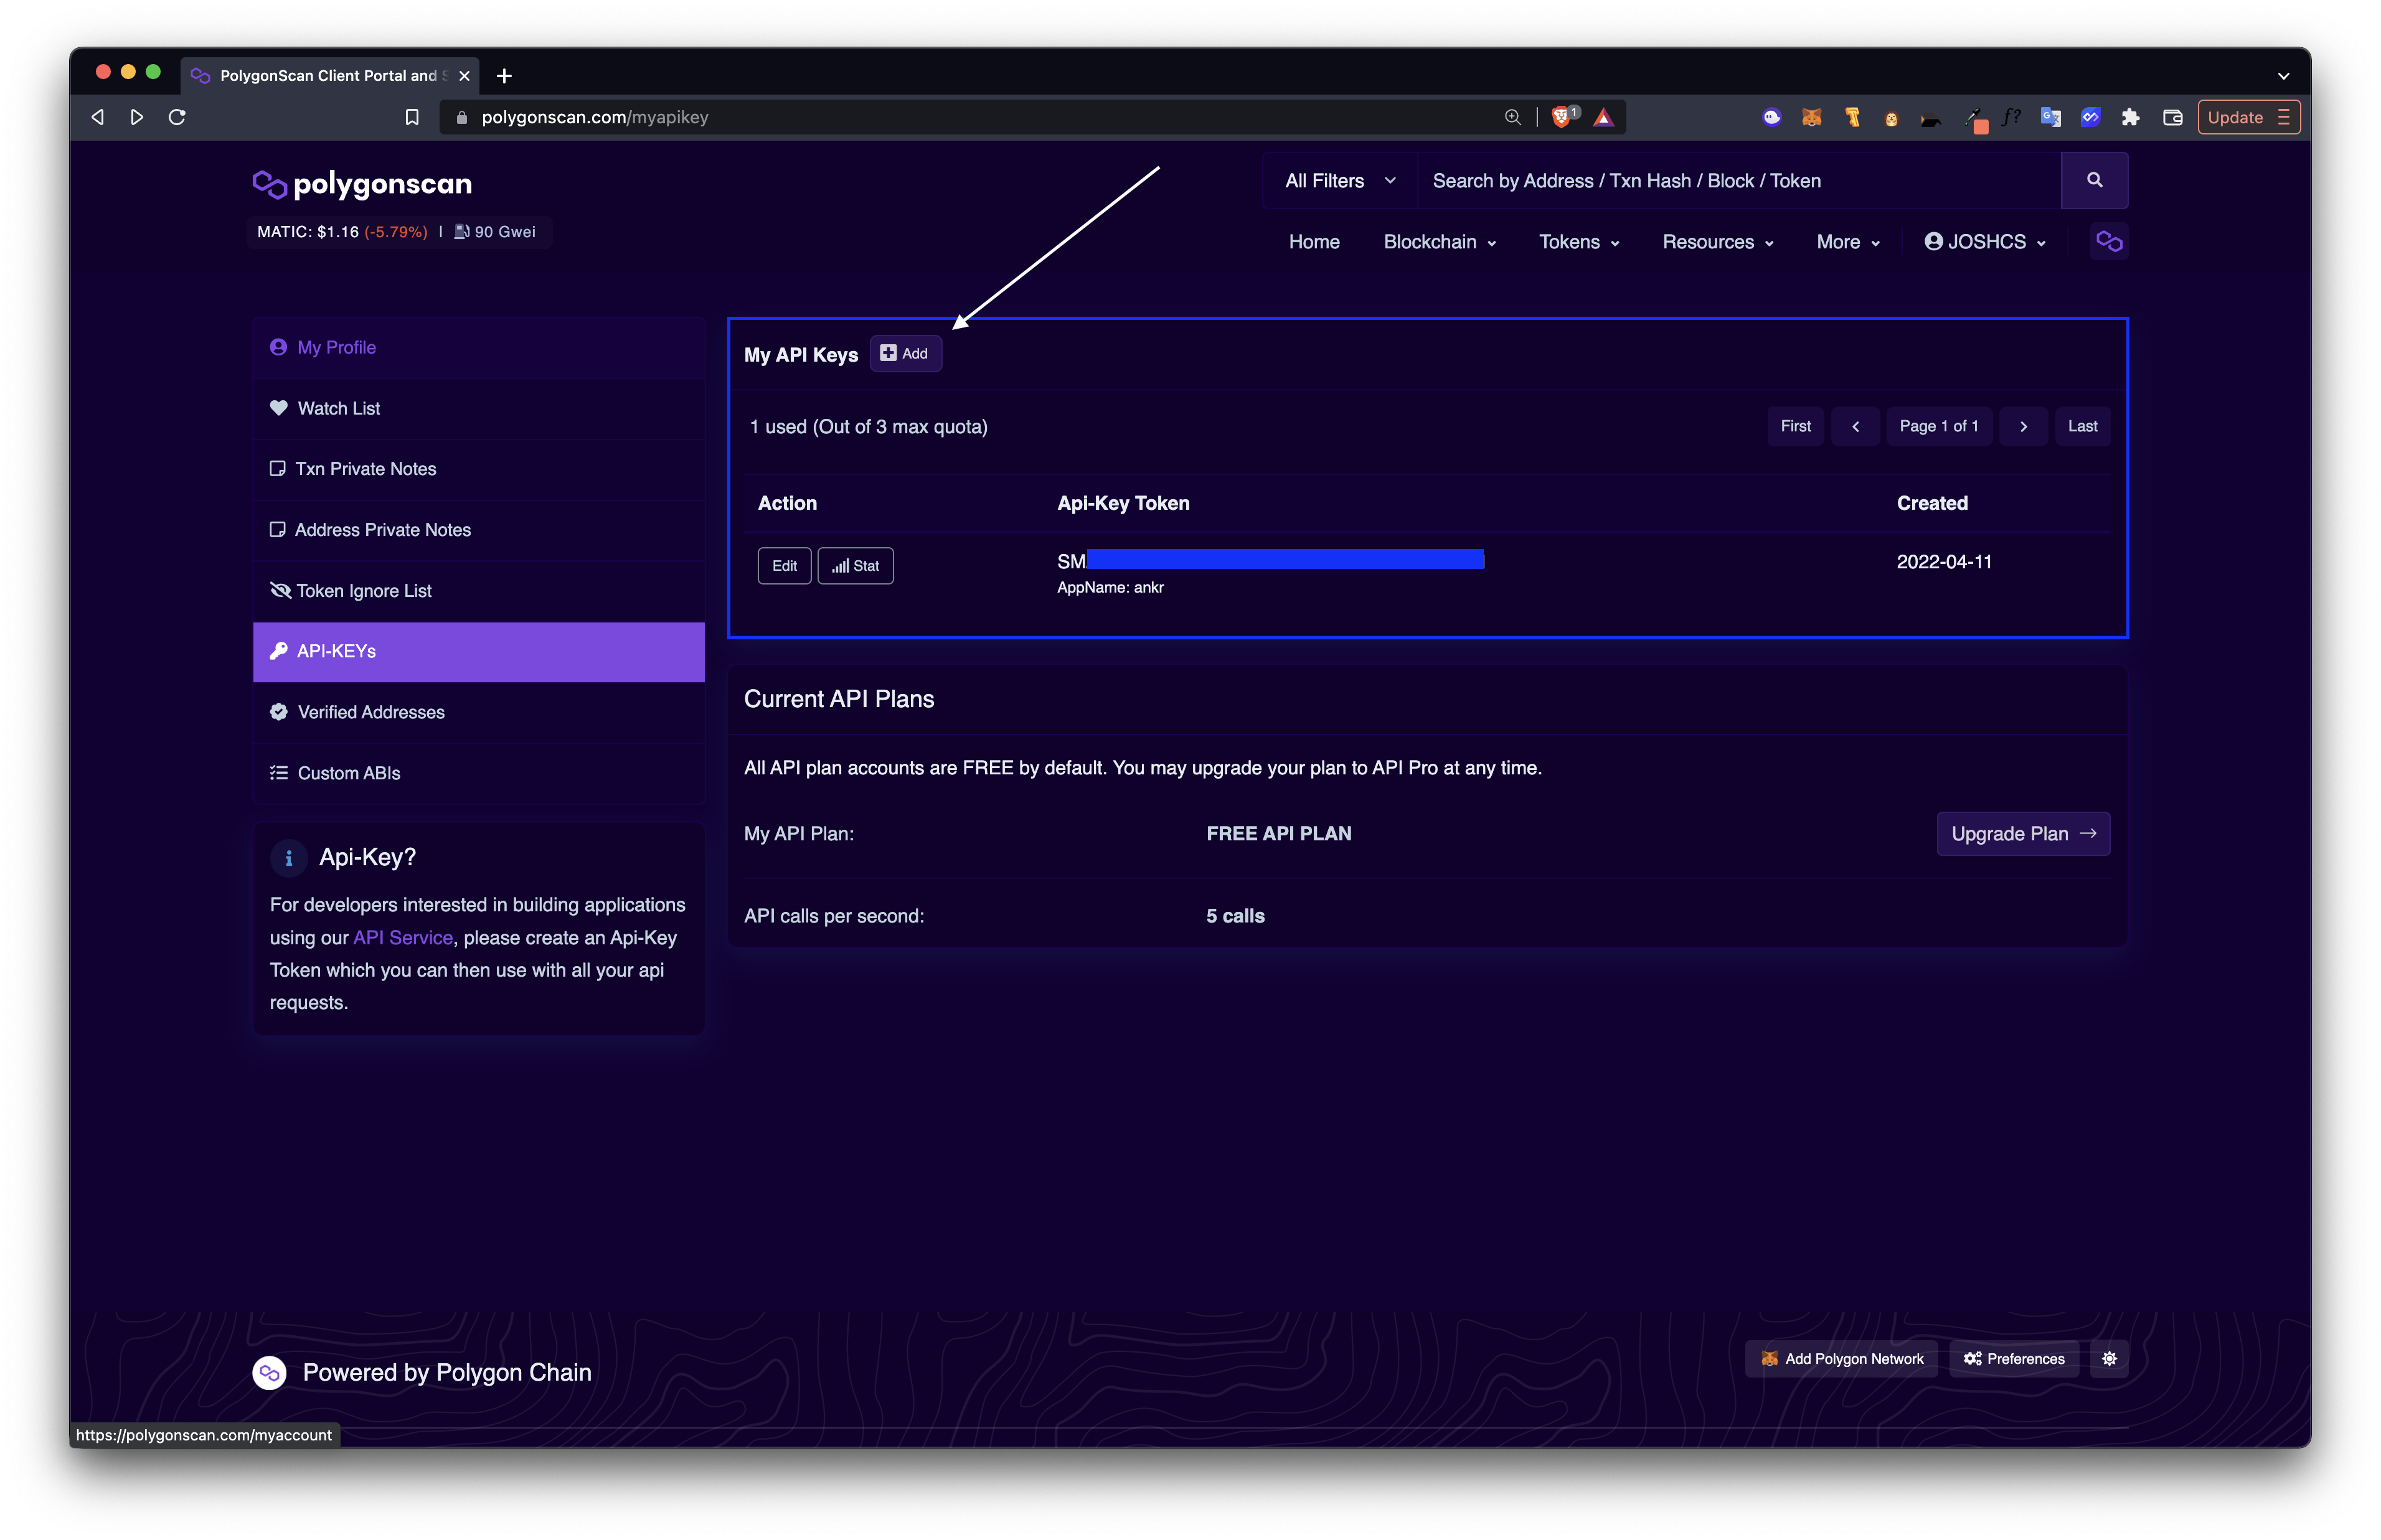
Navigate to polygonscan.com, polygonscan is the native block explorer for Polygon. We will use this to generate a unique API key for the smart contract that we are deploying to verify the contract on polygonscan. This will allow the bytecode to be decoded into human-readable code. Register a new account, add a new API key, and copy the key from polygonscan.com. This will allow us to verify our contract on polygonscan once it has been deployed.
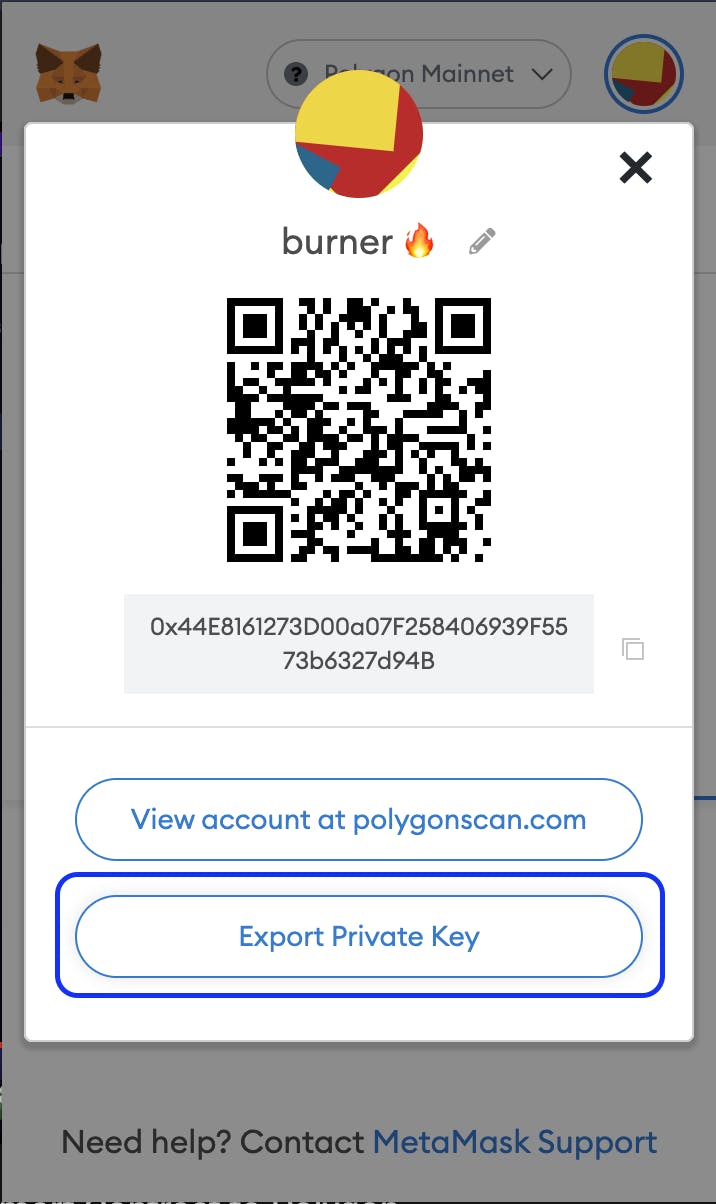
Copy the private key from your MetaMask wallet with $MATIC in it.

Paste these keys into your .env file:
WALLET_PRIVATE_KEY=[YOUR_PRIVATE_METAMASK_KEY]
POLYGONSCAN_API_KEY=[YOUR_POLYGONSCAN_API_KEY]
Create a new Deploy.js file in the scripts directory. This will be the script to deploy your smart contract to the Polygon blockchain.
// open main asynchronous function will handle deployment
const main = async () => {
  try {

// use hre object that allows us to pass the name of our contract to getContractFactory
    const nftContractFactory = await hre.ethers.getContractFactory(
      "AnkrPolygonNFT"
    );

// create variable to allow us to use the deploy function of getContractFactory
    const nftContract = await nftContractFactory.deploy();

// await deployment of contract
    await nftContract.deployed();

// log the address of the Contract in our console
    console.log("Contract deployed to:", nftContract.address);
    process.exit(0);

// catch error, if any, and log in console
  } catch (error) {
    console.log(error);
    process.exit(1);
  }
};

main();
Run the following command in your terminal to deploy your smart contract to the Polygon Blockchain, a L2 on Ethereum. Be sure to flag the --network as matic otherwise your terminal will return an error.
npx hardhat run scripts/Deploy.js --network matic
- If the contract was successfully deployed to Polygon’s blockchain, the output should look like this ⬇️ (note: you will need MATIC on Polygon to deploy the contract).
Downloading compiler 0.8.4
Compiled 12 Solidity files successfully
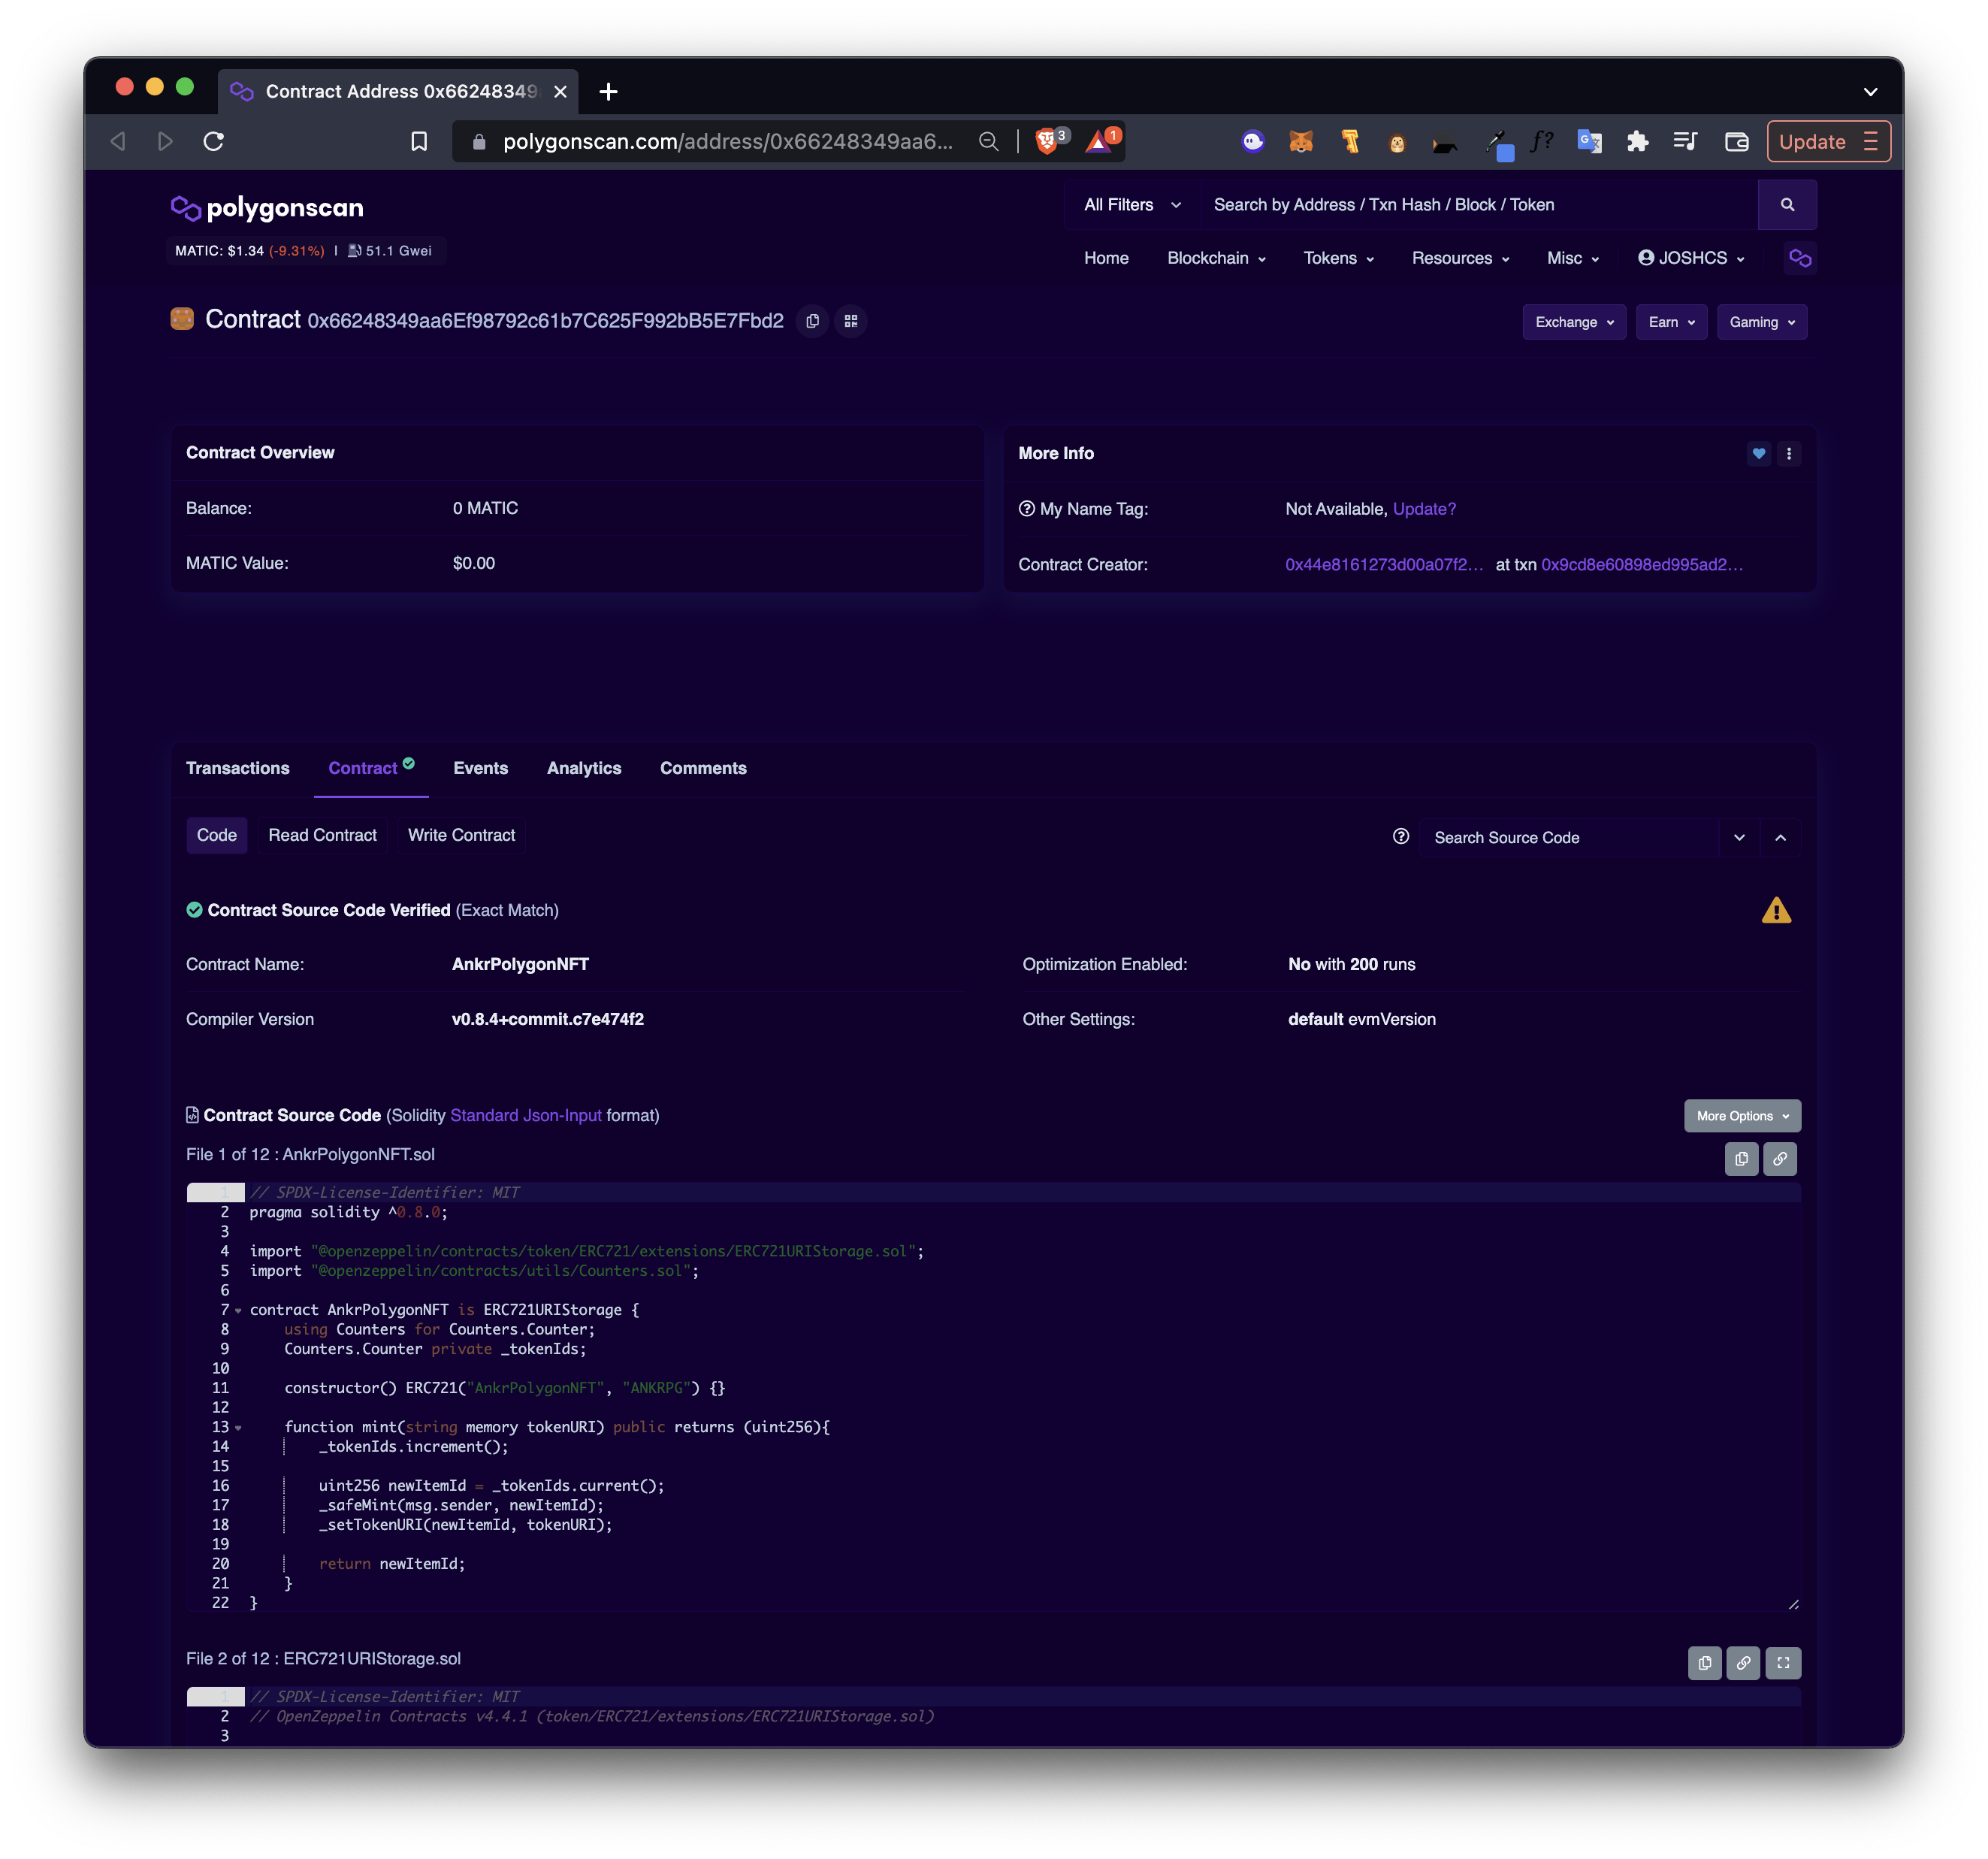
Contract deployed to: 0x66248349aa6Ef98792c61b7C625F992bB5E7Fbd2
Copy the contract address and find it in polygonscan at polygonscan.com.

Be sure your Polygon Scan API key is in your .env file and then run the following command to verify your contract on polygonscan. Verifying the contract on polygonscan will decode the bytecode to human-readable code. Be sure to replace the address with your contract address from above ⬇️
npx hardhat verify 0x66248349aa6Ef98792c61b7C625F992bB5E7Fbd2 --network matic
// your output will look similar to the below
joshstein@Joshs-MacBook-Pro ankr-polygon-nft % npx hardhat verify 0x66248349aa6Ef98792c61b7C625F992bB5E7Fbd2 --network matic
Nothing to compile
Successfully submitted source code for contract
contracts/AnkrPolygonNFT.sol:AnkrPolygonNFT at 0x66248349aa6Ef98792c61b7C625F992bB5E7Fbd2
for verification on the block explorer. Waiting for verification result...

Successfully verified contract AnkrPolygonNFT on Etherscan.

https://polygonscan.com/address/0x66248349aa6Ef98792c61b7C625F992bB5E7Fbd2#code
Our contract is now verified on polygonscan, along with 11 other contracts from Open Zeppelin included in the compilation.
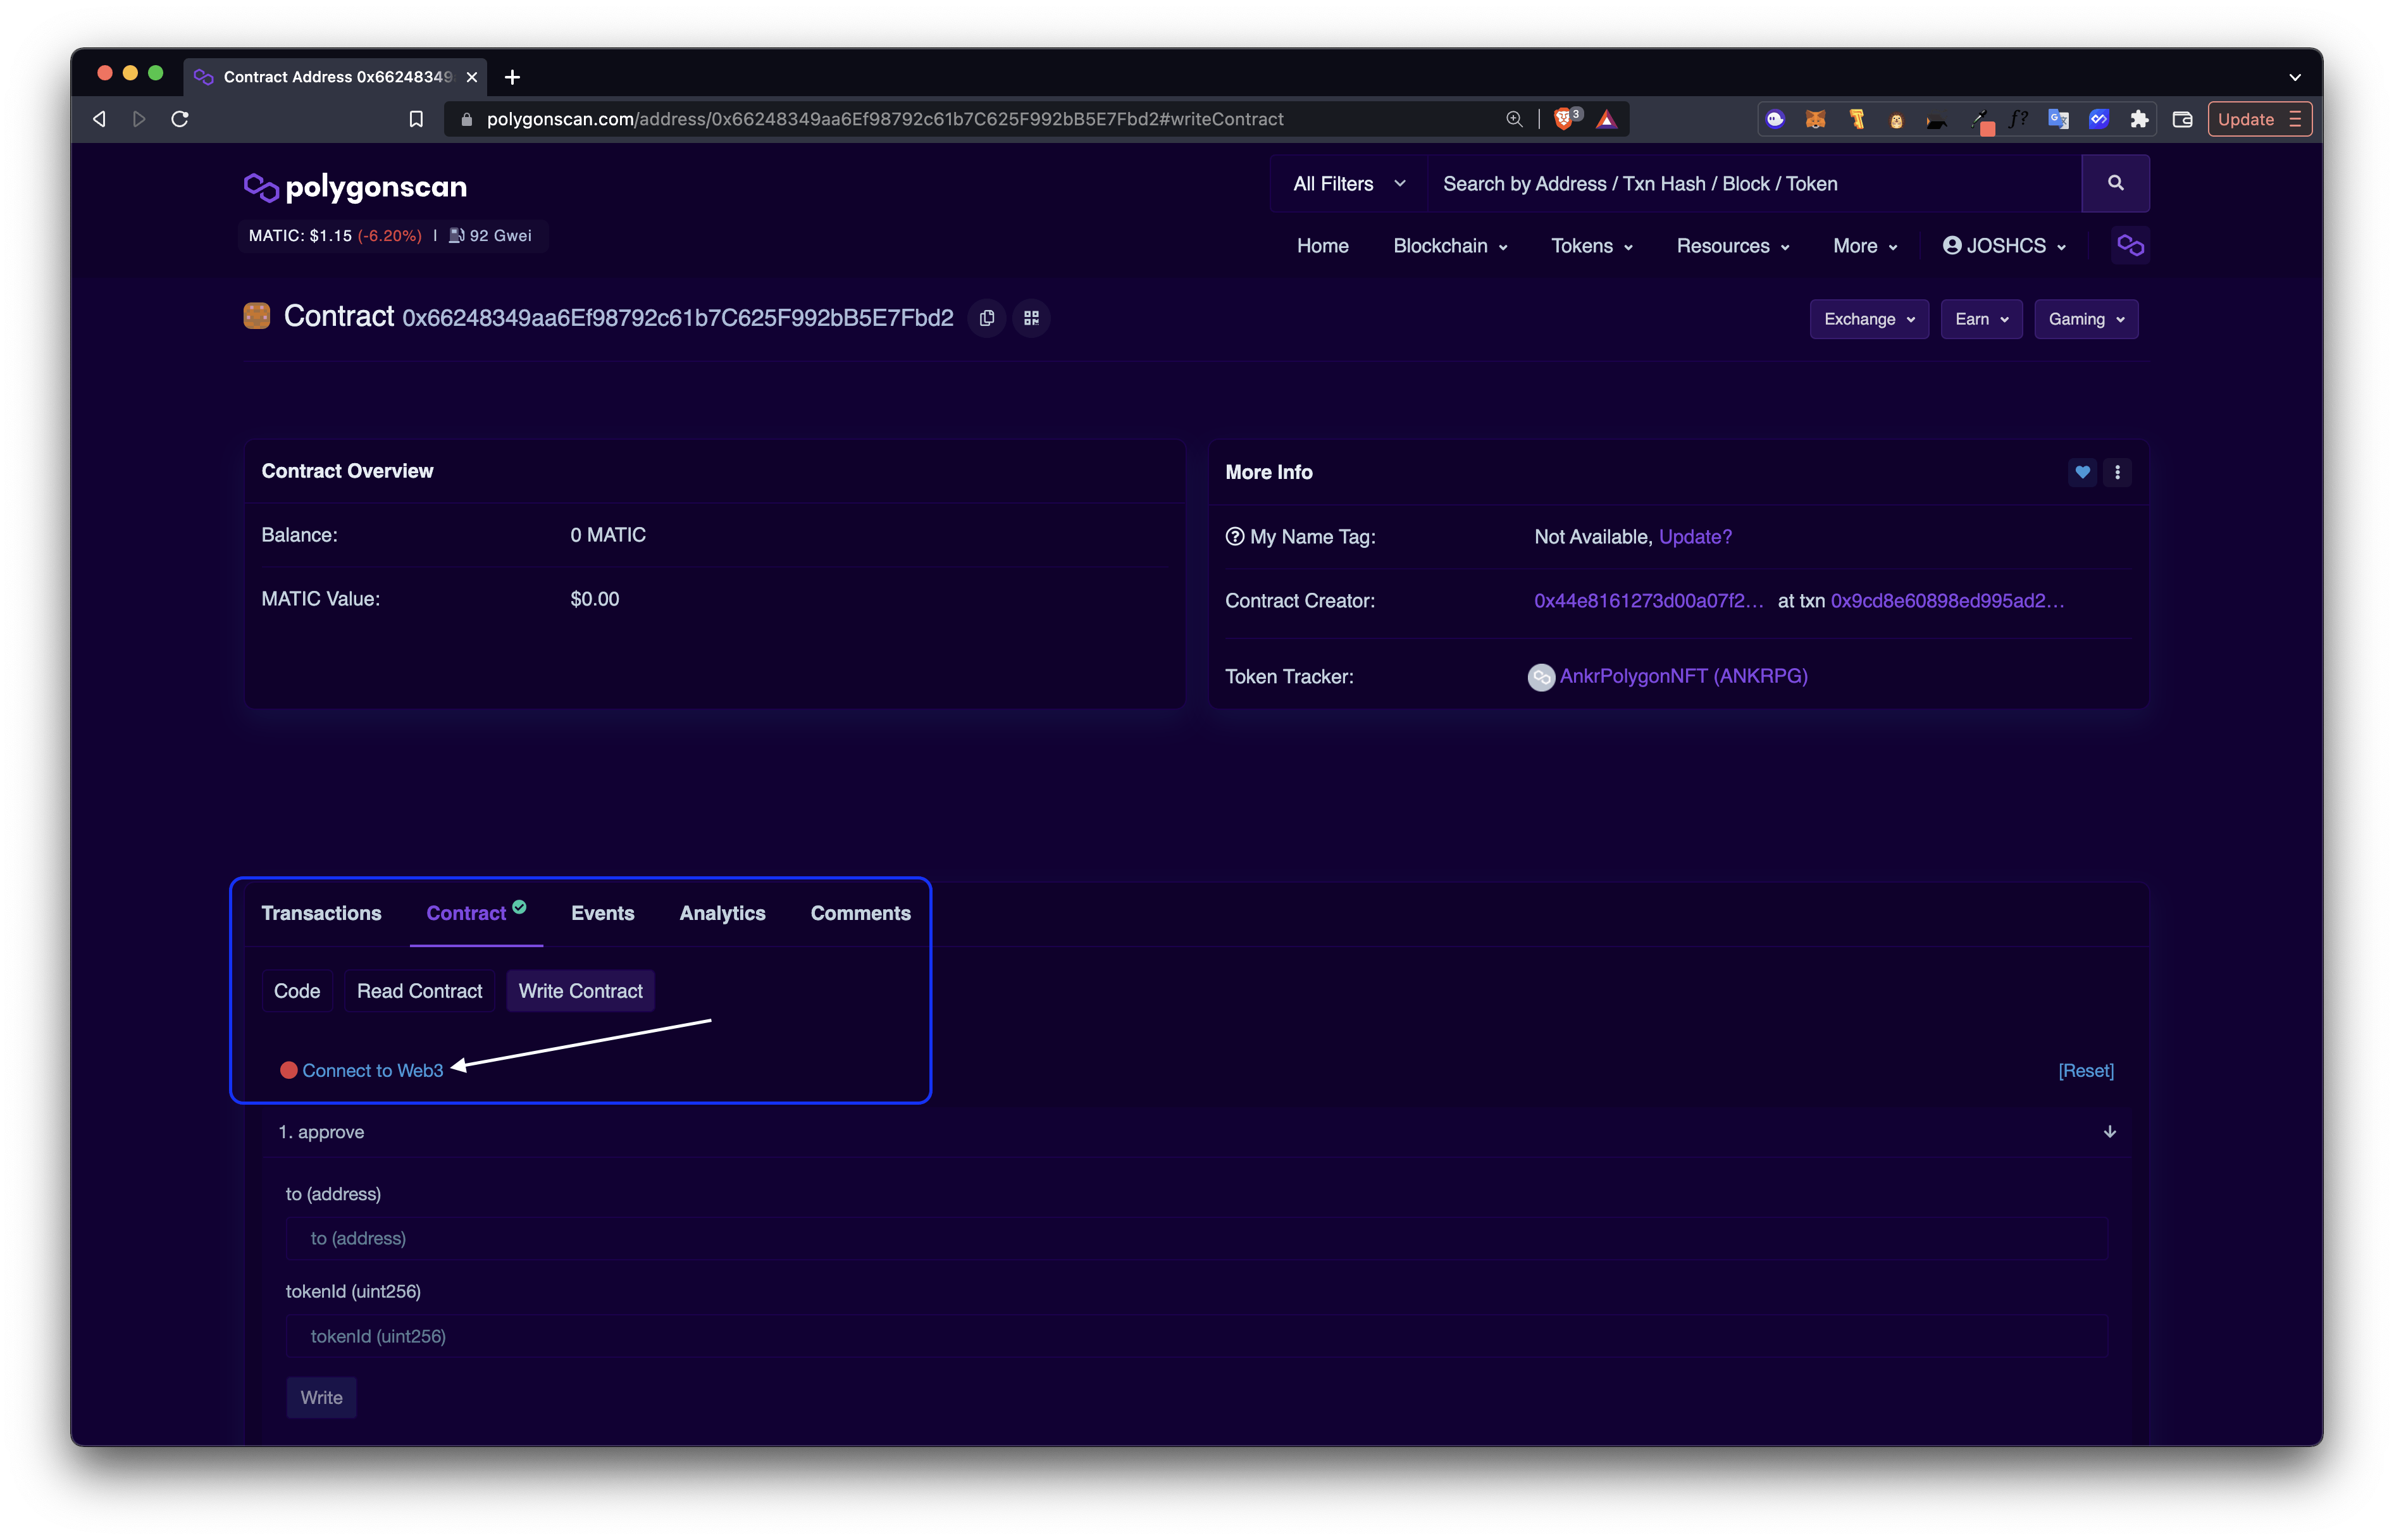
In polygonscan, we are ready to call our function. First, select Contract ✅and then Write Contract. Locate the mint function (this should be #2).
Next, click 🔴 Connect to Web3 to connect your MetaMask wallet.
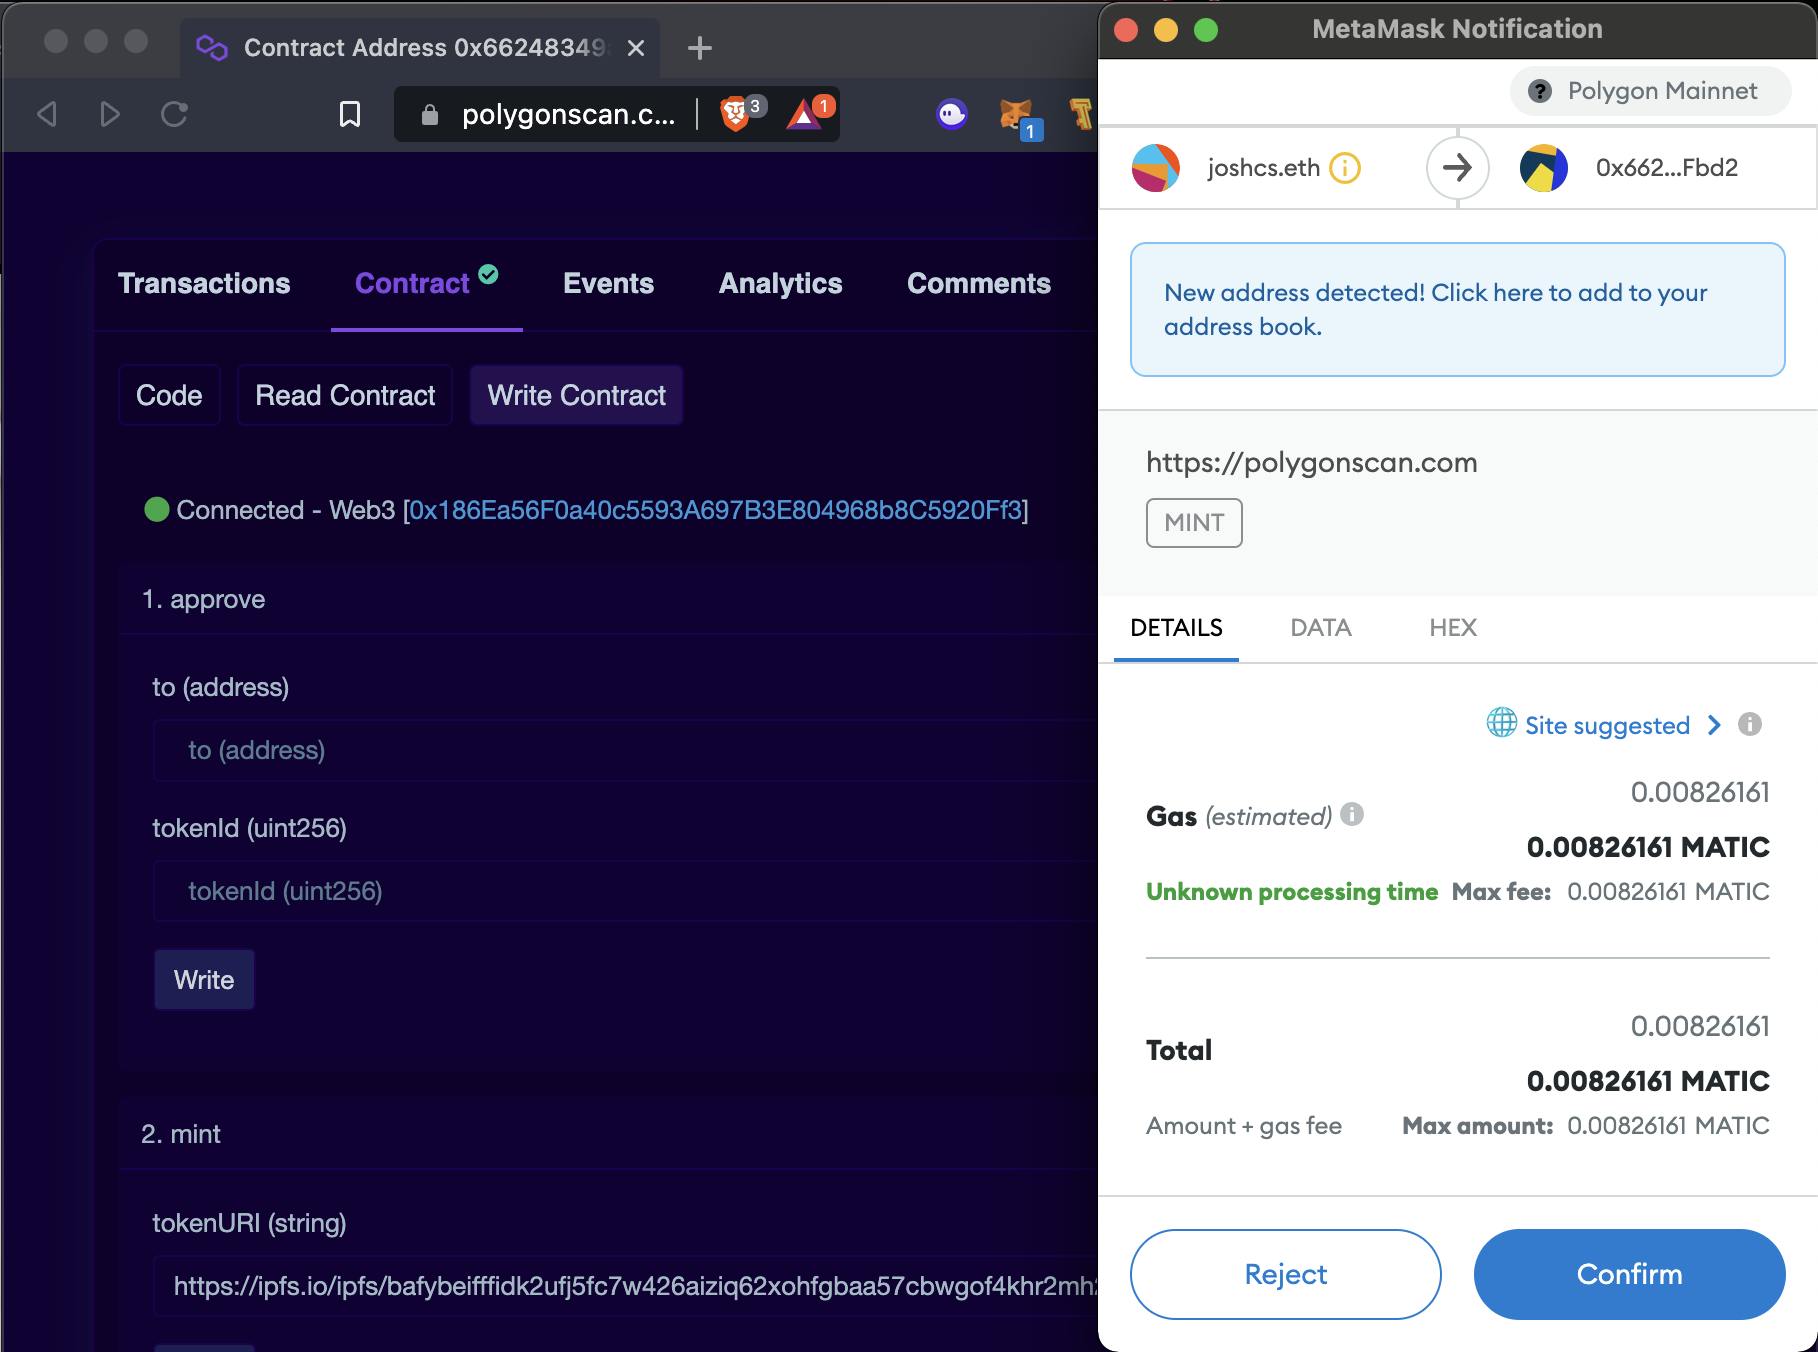
If you connect to your wallet, it will now look like this ⬇️

We will now need to set the Token URI and can use web3.storage to store our image and data. This links to a JSON file. I’ve gone ahead and made an image with the tools we’ve used on this tutorial. Web3.storage is a tool that allows users to store their files on the Interplanetary File System (IPFS) by Protocol Labs.
You can learn more about how to structure your JSON file from OpenSea’s metadata standards.
{
  "name": "Ankr x Polygon ERC-721 Smart Contract",
  "description": "Ankr x Polygon ERC-721 Smart Contract",
  "image": "https://ipfs.io/ipfs/bafybeidtawmsmymozum2ndgjsnzf4pgct3rt4p5x6ywcrkiun7sogcsoi4/Ankr-Polygon.svg",
  "attributes": [
    {
      "trait_type": "Developer",
      "value": "Josh CS"
    },
    {
      "trait_type": "Website",
      "value": "https://ankr.com"
    }
  ]
}
After uploading to web3.storage, paste the URI to your JSON file and select Mint and then Confirm the MetaMask transaction.
Copy the contract address for your contract from the terminal in step 16 and navigate to https://opensea.io/assets/matic/[YOUR_CONTRACT_ADDRESS]/1 to check out your OpenSea gallery to see your NFT!
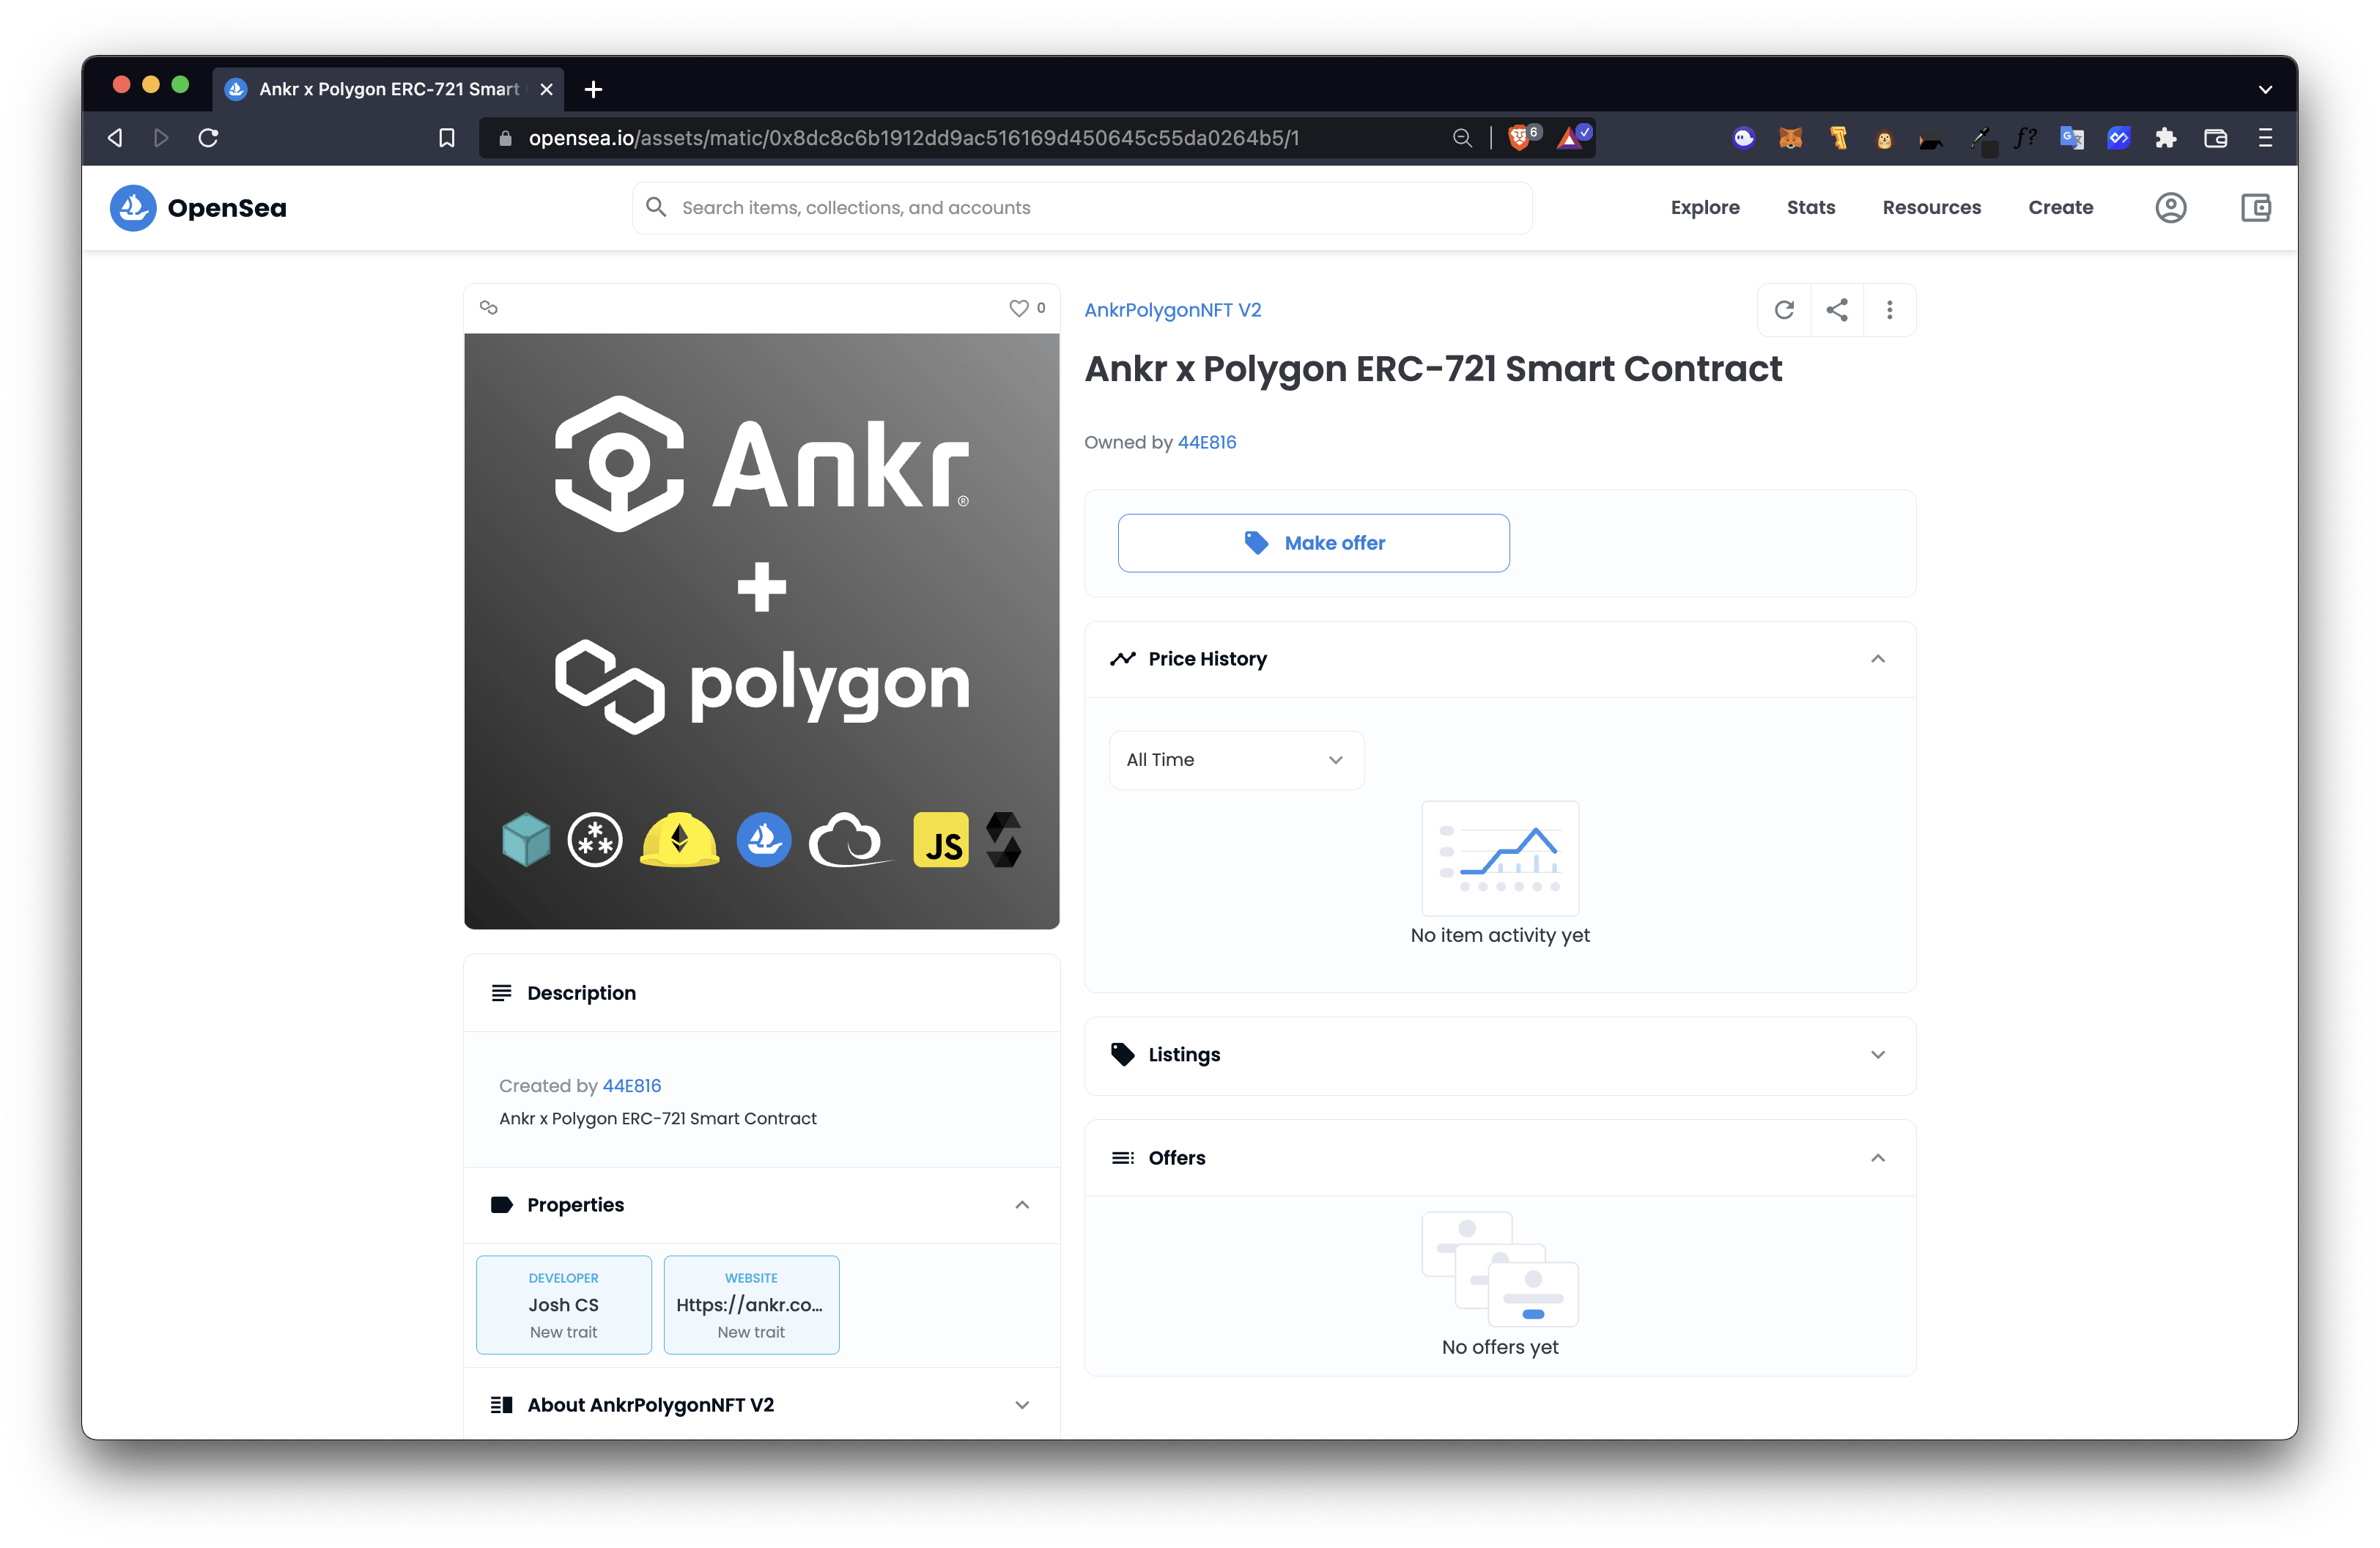
Coming soon!
Congratulations on deploying an ERC-721 Smart Contract to Polygon Mainnet and minting your NFT! You can look forward to upcoming content from our community to build more on the Web3:
- Create an NFT Marketplace with Ankr and Zora
- Launch an ERC-20 Token with Ankr
- Create a DAO Voting System using Ankr
- Create NFT Collection Minting dApp with Ankr
- How to Write and Deploy a Smart Contract to Ethereum’s Goerli Testnet
- How to Mint an NFT using Ankr on Ethereum’s Goerli Tesnet
Special Thanks
Thank you Rahat Chowdhury from Polygon for making this tutorial possible with your video tutorial.